A classic recipe for apple cake involves creating a simple, moist batter using flour, sugar, eggs, a fat like oil or butter, and a leavening agent. Fresh, chopped apples are folded into the batter, often with spices like cinnamon and nutmeg, before being baked. The result is a tender, flavorful cake perfect for dessert or a snack.
Craving a slice of comforting, homemade goodness without a complicated baking project? You’re in luck. At Recipe-GPT, we believe making the best apple cake recipe should be simple. That’s why we’re sharing an apple cake recipe easy that delivers pure delight without the fuss, resulting in a wonderfully moist apple cake recipe every time.
This isn’t just another simple dessert; it’s truly the best apple cake recipe ever because it combines classic flavors with modern convenience. Our AI-powered platform, Recipe-GPT, is designed to make baking effortless. Use our tools to customize this best apple cake recipe to your exact needs: find ingredient substitutions, adjust serving sizes, or explore exciting flavor variations in an instant.
Get ready to bake a moist apple cake recipe that will impress everyone, including yourself! This article guides you through each simple step to create your perfect apple cake. We’ll also show you how Recipe-GPT provides personalized cooking insights to help you succeed. Let’s dive in and discover why this is the easiest apple cake you’ll ever make.
Why Is This the Easiest Apple Cake Recipe You’ll Ever Make?
Ever felt overwhelmed by complicated baking? We understand. At Recipe-GPT, our goal is to make mealtime decisions simple and cooking truly enjoyable. This apple cake recipe perfectly embodies that mission.
This is one of the easiest recipes you’ll ever make. We designed it specifically for absolute ease, making it perfect for beginners or even the busiest home cooks.
Why is this the best apple cake recipe for simplicity? It comes down to a few key factors:
Simple Ingredients: You likely have most items in your pantry, so no special shopping trips are needed.
Minimal Steps: We streamlined the process, so you won’t have to juggle multiple bowls or complex techniques.
Efficient Mixing: Everything comes together quickly, which means less time cleaning up.
Forgiving by Nature: This recipe is incredibly forgiving. We enhanced the easygoing nature of apple cake to make it almost impossible to go wrong.
Guaranteed Moist Results: Our carefully balanced ingredients ensure a wonderfully moist cake every time, taking the guesswork out of baking.
Recipe-GPT elevates this simple recipe with our AI-powered platform. You can instantly adjust the ingredient list to your exact needs, which means less planning and more time enjoying your kitchen.
Missing an ingredient? Our AI can suggest a substitution instantly. Need to scale the recipe for a family gathering or just a small treat? Recipe-GPT adapts it effortlessly. This personalized approach transforms mealtime from a chore into a quick, intuitive process, helping you create the perfect apple cake for any occasion.
This recipe combines traditional baking simplicity with modern AI efficiency. You get all the comfort of a homemade cake without the usual fuss. It’s the perfect solution for fast inspiration and practical, everyday cooking.
How Can AI Personalize Your Apple Cake Recipe?
Find Ingredient Substitutions Instantly
Ever started baking, only to realize you’re missing a key ingredient? Recipe-GPT can instantly suggest smart substitutions for your apple cake recipe.
This means you can bake a delicious, moist apple cake without an extra trip to the store, making your cooking experience both easy and practical.
For example, if you’re missing an ingredient:
Butter: The AI can suggest using oil or applesauce to keep your cake moist and delicious.
All-purpose flour: Get ideas for using whole wheat flour or a gluten-free blend.
White sugar: Our AI might suggest brown sugar, honey, or maple syrup for a different type of sweetness.
Simply tell Recipe-GPT what you have on hand, and our AI will adjust the recipe for you. This lets you focus on baking, not last-minute shopping.
Adjust Serving Sizes Effortlessly
Whether you’re baking for one or a whole family, getting recipe proportions right can be tricky. Recipe-GPT makes it simple by adjusting your apple cake recipe to any serving size.
With just a click, our AI scales ingredients up or down. No more complicated math or wasted ingredients!
This feature is perfect for:
Busy families: Easily double the recipe for a larger batch or for leftovers.
Individuals or couples: Scale it down to make a smaller, more manageable cake.
Meal planners: Prepare the perfect amount every time.
Say goodbye to guesswork. Recipe-GPT tailors your apple cake recipe precisely to your needs, making meal planning an efficient and enjoyable process.
Discover Flavor Variations
Want to put a unique spin on your apple cake? Recipe-GPT can inspire you with creative flavor variations. Our AI offers personalized suggestions that go beyond the basic recipe to match your taste.
Simply share your preferences, and the AI will generate ideas to make the apple cake truly yours, transforming a standard recipe into a tailored culinary experience.
Some delightful variations our AI can suggest include:
Spiced Apple Cake: Add a pinch of nutmeg, allspice, or cardamom for extra warmth.
Nutty Crunch: Incorporate chopped walnuts, pecans, or almonds into the batter or as a topping.
Caramel Drizzle: Get a recipe for a simple caramel sauce to pour over your finished cake.
Fruit Combo: Try adding a handful of cranberries, raisins, or pears alongside the apples.
These AI-generated ideas help you explore new tastes and ensure your apple cake recipe never gets boring. Get ready to impress your friends and family with exciting new flavor combinations!
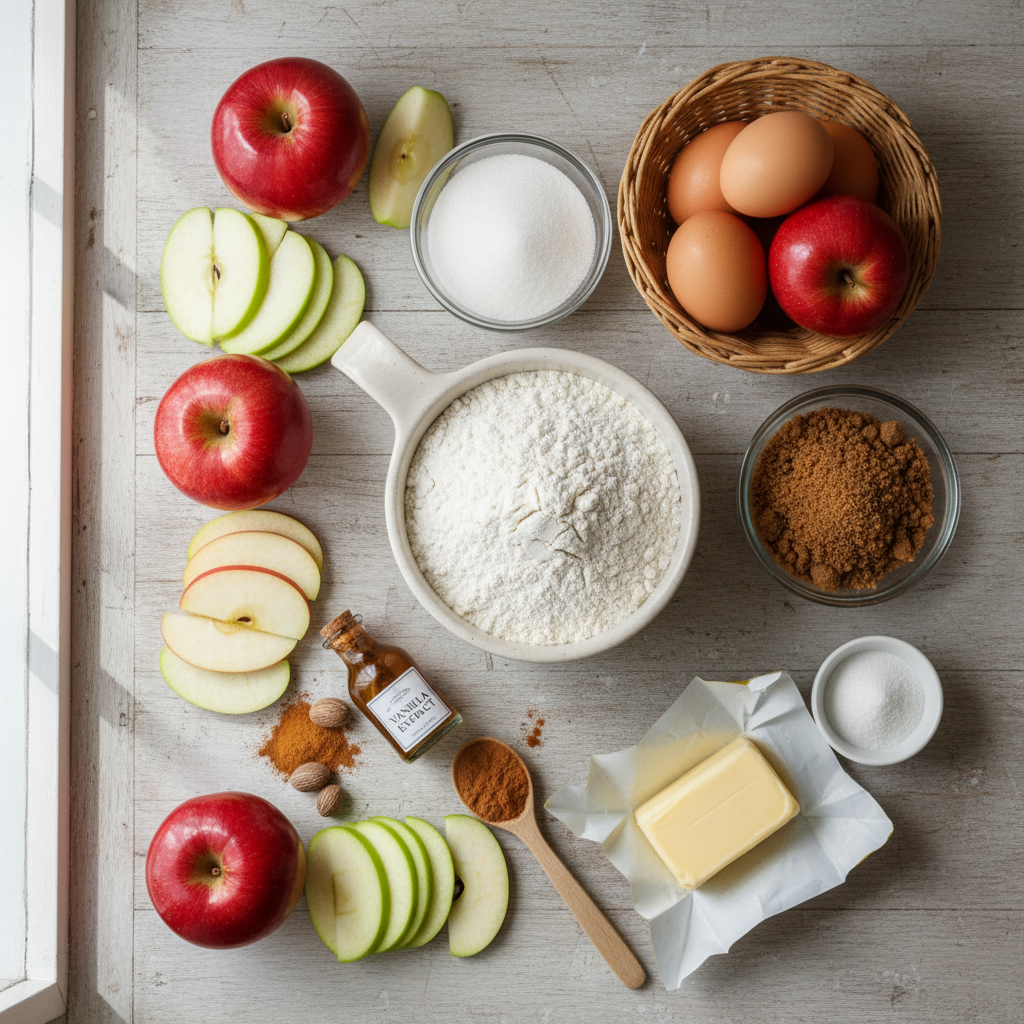
What Ingredients Do You Need for a Moist Apple Cake?
A professional food photography overhead shot (flat lay style), 100% photorealistic, high-quality food magazine photo style. All raw ingredients for a moist apple cake are meticulously arranged on a rustic light-colored wooden kitchen counter. The focus is on vibrant, crisp red and green apples (sliced and whole), flour in a measuring cup, brown and white sugar, eggs, a stick of butter, vanilla extract, cinnamon, nutmeg, and baking powder. Ingredients are neatly organized, with clear separation, creating an inviting and organized visual. Soft, natural light illuminates the scene, highlighting textures and colors.
A truly moist and tender apple cake starts with the right ingredients. Our recipe uses common pantry staples, and Recipe-GPT can help you quickly check what you have. If you’re missing an item, it can even suggest easy substitutions.
For the Cake Batter
All-purpose flour: This provides the main structure for your cake.
Granulated sugar: Sweetens the cake, helps it brown, and attracts moisture for a tender texture.
Unsalted butter: Melted butter adds rich flavor and moisture. Using unsalted gives you precise control over the saltiness.
Large eggs: They bind the ingredients, add richness, and help the cake rise.
Milk: Any type of milk works here, adding moisture and tenderness.
Baking powder & baking soda: These crucial leavening agents create a light and fluffy texture.
Vanilla extract: A splash of vanilla enhances all the other flavors.
Salt: A pinch balances the sweetness and deepens the overall flavor.
Running low on something? Recipe-GPT can suggest clever substitutions, like using almond milk for dairy-free needs or recommending a plant-based butter. This way, you can still bake a delicious apple cake without a last-minute trip to the store.
For the Apple Filling
The apple filling is the heart of this cake, providing a wonderful aroma and a perfect balance of natural sweetness and tartness. The right ingredients will create a delicious texture that beautifully complements the tender cake.
Apples: Fresh, firm apples are essential. For the best flavor, we recommend a mix of sweet and tart varieties like Granny Smith, Fuji, or Honeycrisp.
Granulated sugar: A small amount enhances the apples’ natural sweetness and creates a syrupy texture as they bake.
Ground cinnamon: This classic spice pairs perfectly with apples, adding warmth and depth to the filling.
Lemon juice: A squeeze of lemon brightens the apple flavor and prevents the slices from browning too quickly.
Want to experiment with flavors? Recipe-GPT can help! Ask our AI to suggest other spice combinations, like a hint of nutmeg or cardamom, or to recommend different apple varieties based on your preferences. Enjoy exploring new twists on this easy apple cake recipe!
How Do You Make Apple Cake From Scratch?
A professional food photography shot, 100% photorealistic, high-quality food magazine photo style. A generous slice of a perfectly baked, moist, golden-brown apple cake is carefully placed on a delicate white ceramic plate. The cake slice reveals its tender crumb and visible apple chunks. A dusting of powdered sugar elegantly garnishes the top. In the soft-focused background, the remaining whole apple cake sits on a wooden cutting board, with a small silver cake server resting beside it. The setting is a cozy home kitchen table with a warm, inviting atmosphere, illuminated by soft, natural light, emphasizing deliciousness and comfort.
Step 1: Prepare the Apples and Pan
A delicious apple cake starts with simple prep work. First, get your apples and baking pan ready.
Peel, core, and thinly slice your apples, aiming for consistent thickness to ensure they cook evenly. The type of apple you choose also makes a difference. If you’re unsure which variety to use, Recipe-GPT can suggest the best options based on your preferences or adjust the recipe for the apples you already have.
Next, prepare your pan by generously greasing and lightly flouring it to prevent the cake from sticking. A 9-inch square pan or a round springform pan are both excellent choices for this recipe.
Step 2: Mix the Wet Ingredients
In a large mixing bowl, you’ll combine the wet ingredients to create the rich base for your cake.
Start by creaming together the softened butter and granulated sugar until the mixture is light and fluffy, which usually takes a few minutes. Next, beat in the eggs one at a time, mixing well after each addition. Finish by stirring in the vanilla extract.
Pro Tip: Ran out of butter? Recipe-GPT can offer instant solutions and suitable substitutions, such as using oil instead. Our AI helps keep your baking journey smooth and stress-free.
Step 3: Combine the Dry Ingredients
Now that the wet ingredients are mixed, it’s time to prepare the dry ones. Combining them in a separate bowl first ensures they are evenly distributed, which helps the cake rise properly.
In a medium bowl, whisk together the all-purpose flour, baking powder, salt, and ground cinnamon until they are fully combined.
Recipe-GPT can also help you personalize these ingredients. For instance, our AI can suggest spice variations like nutmeg or provide gluten-free flour blend options to make baking accessible for everyone.
Step 4: Fold Everything Together
It’s time to bring all your ingredients together into a delicious batter. Remember, gentle mixing is the key to a tender and moist cake.
Gradually add the dry ingredients to the wet mixture, mixing only until just combined to avoid a tough cake. Once the batter is ready, carefully fold in the prepared apple slices, distributing them evenly for a burst of apple in every bite.
Pour the finished batter into your prepared pan and use a spatula to spread it evenly. For creative variations, ask Recipe-GPT for optional additions like chopped walnuts or pecans.
Step 5: Bake to Perfection
The final step is baking, where the magic happens and your kitchen fills with an amazing aroma.
Preheat your oven to 350°F (175°C) and place the pan inside. Bake for 45-55 minutes. Since baking times can vary, check for doneness by inserting a wooden skewer or toothpick into the center of the cake. It should come out clean.
Once baked, remove the cake from the oven and let it cool in the pan for 10-15 minutes before transferring it to a wire rack to cool completely. This step ensures the cake has a stable structure for easy slicing. If you’re using a different pan size, Recipe-GPT can adjust the baking time to guarantee perfect results.
What Are the Best Tips for a Perfect Apple Cake?
Choosing the Right Apples
Selecting the perfect apples is the first step toward a delicious cake, ensuring great texture and flavor. Some varieties hold their shape well during baking, while others can become too mushy.
If you’re unsure which apples to use, Recipe-GPT can suggest the best options based on what’s in your pantry. Tell our AI what you have on hand to find the perfect recipe.
Here are some top picks for apple cake:
Granny Smith: Offers a tart contrast. They stay firm during baking [1].
Honeycrisp: Sweet, crisp, and holds shape beautifully.
Braeburn: A good balance of sweet and tart. It bakes down nicely.
Fuji: Very sweet and crunchy. It softens well in the oven.
Golden Delicious: Mildly sweet and tender. It blends smoothly into the cake.
For a more complex flavor, try mixing different varieties. Combining a tart apple with a sweeter one often yields the best results.
How to Avoid a Dry Cake
A moist, tender cake is the goal, and a few simple techniques can help you avoid a dry result. Paying attention to your ingredients and baking time is essential.
Our AI-powered recipes are designed with balanced ingredients for a perfect texture. Recipe-GPT can also adjust ingredient ratios if you need to make a substitution.
Don’t Overmix the Batter: Overmixing develops gluten, which can make your cake tough and dry. Mix just until the ingredients are combined.
Measure Flour Accurately: Too much flour is a common cause of dry cake. For best results, use a kitchen scale. If you don’t have one, spoon the flour into your measuring cup and level it off.
Add Enough Fat and Moisture: Ingredients like butter, oil, eggs, and buttermilk add richness and keep the cake tender.
Don’t Overbake: An overbaked cake will always be dry. Use a toothpick test—when inserted into the center, it should come out with a few moist crumbs attached.
Use Ripe, Juicy Apples: Fresh, juicy apples release moisture as they bake, which contributes to a tender crumb.
Storage and Freezing Instructions
Proper storage will keep your apple cake fresh for days. You can also freeze it in portions for a treat later on.
To avoid leftovers, Recipe-GPT can help you adjust the serving size for any recipe, making it easy to bake just what you need.
Storage Tips:
At Room Temperature: Keep the cooled cake in an airtight container for 2-3 days.
In the Refrigerator: To store it longer, especially if it has cream cheese frosting, refrigerate the cake for up to one week. Bring it to room temperature before serving for the best flavor.
Freezing Instructions:
Cool Completely: Always let the cake cool completely before freezing to prevent it from getting soggy.
Wrap Tightly: Wrap individual slices or the whole cake first in plastic wrap, then in a layer of aluminum foil.
Freeze: Place the wrapped cake in a freezer-safe bag or container. It will keep for up to 3 months.
Thaw: Thaw frozen cake overnight in the refrigerator or for a few hours at room temperature.
Optional Add-ins and Toppings
Personalize your apple cake with creative additions and toppings. If you’re looking for inspiration, tell Recipe-GPT your preferences, and our AI can generate new flavor combinations for you.
These simple additions can elevate your dessert, turning a good apple cake into a great one.
Delicious Add-ins:
Nuts: Chopped walnuts, pecans, or almonds provide a delightful crunch.
Dried Fruits: Raisins, cranberries, or chopped dried apricots add extra sweetness and chewiness.
Spices: Enhance the apple flavor with a pinch of nutmeg, allspice, or cardamom. A touch of ginger adds warmth.
Orange or Lemon Zest: Brighten your cake with citrus zest for a fresh, aromatic note.
Chocolate Chips: For a decadent twist, fold in white or milk chocolate chips.
Irresistible Toppings:
Crumble Topping: A buttery, streusel-like topping adds satisfying texture.
Cream Cheese Frosting: Tangy and sweet, this frosting is a perfect complement to apples.
Simple Glaze: A powdered sugar glaze with a dash of vanilla or lemon is quick and easy.
Caramel Drizzle: A warm caramel sauce takes the cake to the next level.
Whipped Cream or Ice Cream: Serve warm slices with a dollop for a classic pairing.
Frequently Asked Questions About Apple Cake
What makes an apple cake moist?
A perfectly moist apple cake comes from the right balance of ingredients. Fats like butter or oil add richness and tenderness, while sugar does more than just sweeten—it also attracts and holds onto moisture.
Eggs provide structure and help bind the cake together. The most important ingredient, however, is the apples. As they bake, they release their natural juices, infusing the cake with incredible moisture and flavor.
Finally, be careful not to over-bake, as this will dry out your cake. Our AI-powered recipes provide clear instructions to help you achieve the ideal moist texture every time and avoid common baking mistakes.
What kind of apples are best for apple cake?
The best apples for cake are firm enough to hold their shape during baking without turning to mush. A good balance of sweet and tart flavors will also add depth to your dessert.
Here are some excellent choices for baking:
Granny Smith: Offers a tart kick and firm texture.
Honeycrisp: Sweet, crisp, and holds its shape beautifully.
Fuji: Mildly sweet with a satisfying crunch.
Braeburn: A great all-rounder, balancing sweetness and tartness.
Gala: Sweet and aromatic, good for a milder flavor.
For a more complex flavor, try mixing two or more varieties. If you’re unsure which apples to use, just tell Recipe-GPT what you have on hand. Our AI can customize a recipe for you, offering quick and practical suggestions.
Can I make apple cake with oil instead of butter?
Yes, you can definitely use oil instead of butter in an apple cake. This is a fantastic substitution that often results in an even moister cake that stays fresh longer.
However, there are some differences to keep in mind:
Flavor: Butter adds a rich, dairy flavor. Oil, in contrast, offers a more neutral taste.
Texture: Cakes made with oil are often more uniformly moist and tender. They can also be lighter in crumb.
Substitution: You can generally substitute oil for butter at a 1:1 ratio by volume. For instance, if a recipe calls for 1 cup of butter, use 1 cup of oil.
Recipe-GPT makes substitutions effortless. Ask our AI to adapt any recipe to use oil, and it will generate a customized version for you. It’s perfect for adjusting to your pantry or dietary needs.
How do you store fresh apple cake?
Proper storage will keep your apple cake fresh and delicious. Here’s how to do it effectively:
At Room Temperature: Let the cake cool completely, then store it in an airtight container. It will stay fresh for up to 2-3 days [2]. This is ideal for quick enjoyment.
In the Refrigerator: For longer freshness, especially in warmer climates, refrigerate your cake in an airtight container. It can last up to 5-7 days. Bring it to room temperature before serving for the best flavor.
Freezing for Longer Storage: Apple cake freezes very well. Wrap individual slices or the whole cake tightly in plastic wrap, then add a layer of aluminum foil. It can be frozen for up to 2-3 months. Thaw overnight in the refrigerator before serving.
From baking to storage, Recipe-GPT simplifies every step. Our AI-powered guidance helps you enjoy your delicious creations longer with practical tips like these.
Dump cake recipes are known for their simplicity, typically involving ‘dumping’ a fruit filling or pie filling into a baking dish, covering it with dry cake mix, and topping it with melted butter before baking. This method creates a delicious, cobbler-like dessert with almost no mixing or prep work required.
We’ve all been there: you get a sudden craving for something sweet, but complex baking steps, endless measuring, and a pile of dirty dishes feel like too much work. Fortunately, there’s a dessert so simple and delicious, it practically makes itself. Meet the humble yet mighty dump cake—the ultimate answer to your dessert dilemmas, perfect for busy home cooks and families alike.
Dump cakes are exactly what they sound like: you simply “dump” ingredients into a pan and bake. This means no mixing bowls and no intricate techniques, just pure dessert magic. Here at Recipe-GPT, we’ve taken this beloved concept and given it an AI-powered upgrade. Our intelligent system helps you discover personalized dump cake recipes by suggesting variations based on ingredients you have on hand or specific dietary needs, making quick dessert decisions easier than ever.
Get ready to turn simple pantry staples into show-stopping treats with minimal fuss. In this guide, we’ll explore over ten incredibly easy dump cake recipes, from timeless classics to exciting new flavor combinations. You’ll see what makes dump cakes the go-to quick dessert and how Recipe-GPT can help you craft endless delicious variations.
What Makes Dump Cake Recipes So Easy?
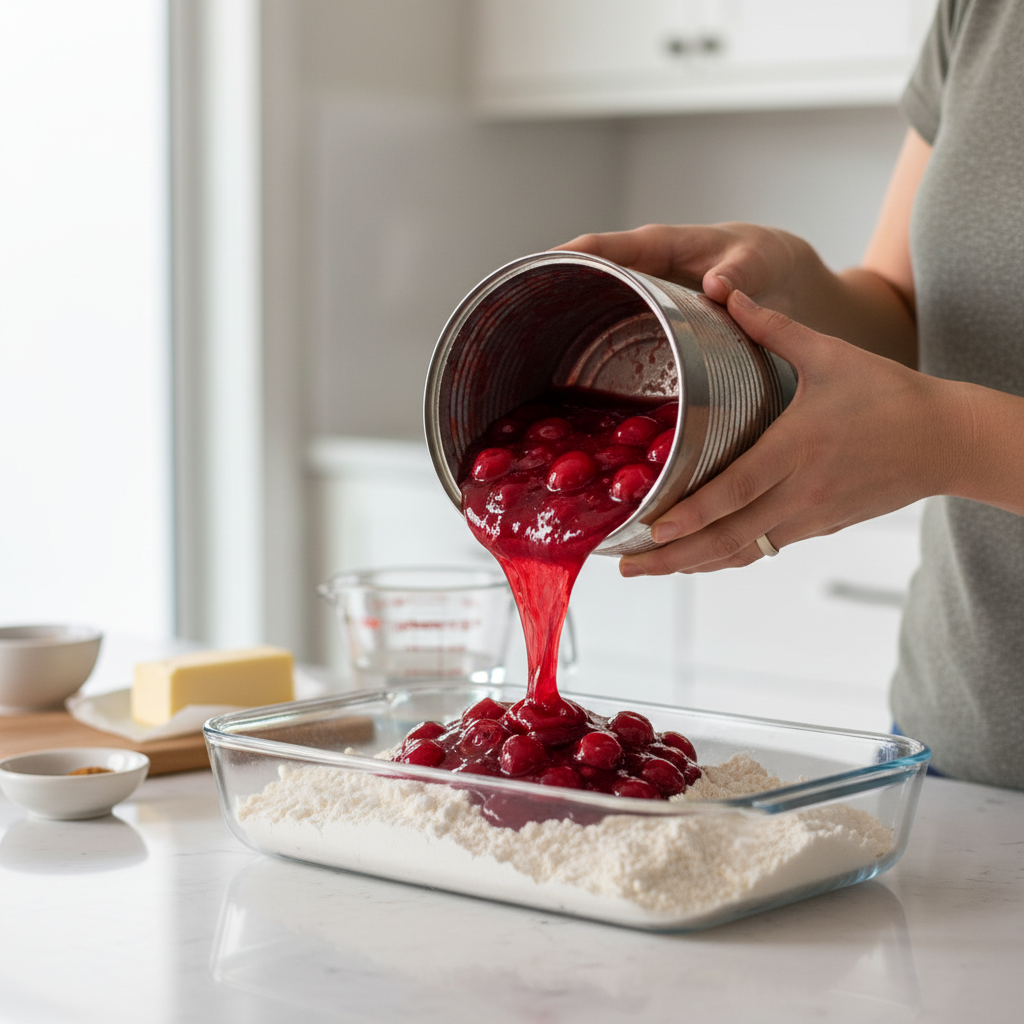
Professional food photography, photorealistic, high-quality food magazine photo style: A close-up shot in a bright, modern home kitchen, showing a woman’s hands (real human cook, not AI render) gently ‘dumping’ a can of fruit pie filling directly into a baking dish already containing dry cake mix. A stick of butter and a few other simple ingredients are neatly arranged on the clean countertop in the background, out of focus. The scene emphasizes ease and minimal effort. Bright, natural lighting.
Dump cakes are a game-changer for dessert lovers. True to their name, you simply “dump” the ingredients into a baking dish and bake. It’s a delightfully easy process that takes the stress out of baking, making these treats a favorite for busy cooks everywhere.
This simple approach is what Recipe-GPT is all about. Our platform focuses on quick and practical recipes, so dump cakes align perfectly with our mission. We help you get delicious, homemade results without the complicated steps or unnecessary effort.
Simple Ingredients, Simple Prep
The secret to a dump cake’s ease is its straightforward ingredient list. Most recipes call for just a few common items, and you won’t need any complex culinary tools. This simplicity makes both shopping and prep an absolute breeze.
Minimal Items: Often, you only need 3-5 main ingredients.
Pantry Staples: Most recipes use items you already have.
No Fancy Gear: A baking dish is usually all you need.
The “Dump and Go” Method
What truly makes dump cakes revolutionary is the technique. Forget separate mixing bowls, creaming, or folding—you simply layer everything in the pan. Because there’s no extra mess, cleanup is incredibly fast.
Layer and Bake: Ingredients are layered directly in the pan.
No Mixing Required: The oven does all the work for you.
Effortless Assembly: This saves valuable time in the kitchen.
Forgiving and Flexible
Dump cakes are incredibly forgiving, which makes them perfect for beginners since it’s tough to make a mistake. Their flexible nature also allows for endless variations, and Recipe-GPT can help you explore new flavor combinations.
Beginner-Friendly: Ideal for new cooks building confidence.
Hard to Mess Up: Minor adjustments rarely ruin the dessert.
Versatile Flavors: Easily swap fruits or cake mixes.
This inherent ease is what makes dump cake recipes so popular, and Recipe-GPT takes that simplicity even further. Our platform provides instant, AI-generated suggestions, so you can quickly discover personalized variations. Enjoy a delicious, stress-free dessert tonight!
Our Top 10 AI-Powered Dump Cake Recipes
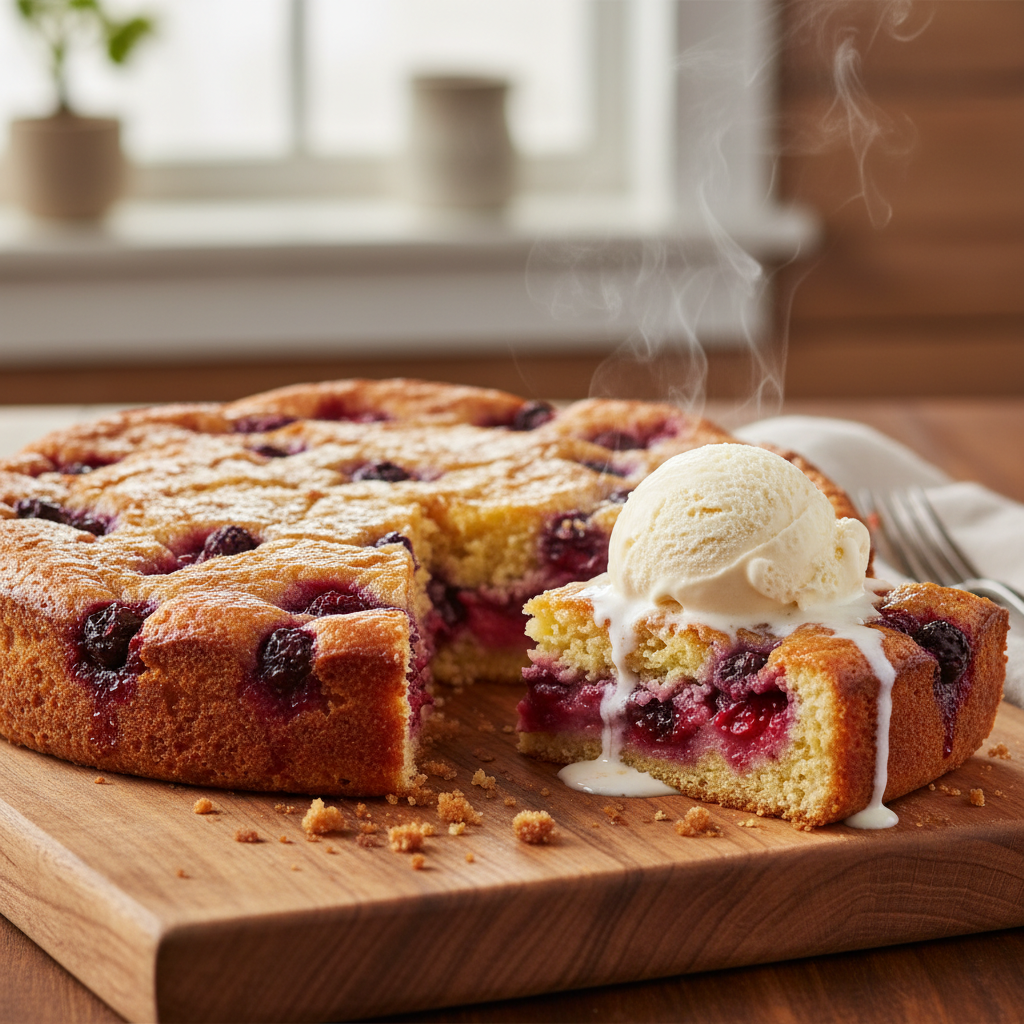
Professional food photography, photorealistic, high-quality food magazine photo style: A perfectly baked, warm dump cake, golden brown and bubbly, presented on a rustic wooden board. A slice has been removed, revealing the moist fruit and cake layers. A dollop of melting vanilla ice cream sits on top of the slice. The background is softly blurred, hinting at a cozy home dining setting. Excellent lighting, steam subtly rising from the cake, focus on delicious texture.
The Original Cherry Dump Cake
This classic dessert is the ultimate easy treat. Simply “dump” the ingredients into a pan to create a warm, bubbly cherry filling with a tender cake topping. This recipe proves that delicious can be simple.
Need to make a change? Recipe-GPT can instantly suggest a gluten-free cake mix or a sugar-free cherry pie filling to accommodate any dietary needs. Get tailored ideas in seconds.
Key Ingredients: Cherry pie filling, yellow cake mix, butter.
AI Help: Get ingredient swaps or adjust serving sizes effortlessly.
Classic Peach Dump Cake
Enjoy the sweet taste of summer with this simple peach dump cake, which combines juicy peaches with a golden cake topping. Perfect for any occasion, this dessert takes minimal effort to prepare.
Have fresh peaches instead of canned? Recipe-GPT can generate precise instructions for the swap. You can also explore additions like a hint of cinnamon or nutmeg, making customization simple.
Key Ingredients: Peach pie filling, yellow cake mix, butter.
AI Help: Convert fresh fruit measurements or suggest complementary spices.
Decadent Chocolate Dump Cake
Indulge your cravings with this rich and easy chocolate dump cake. Featuring a fudgy chocolate base and a moist cake topping, it’s a perfect treat for any chocolate lover. It delivers a gourmet experience but only takes minutes to assemble.
Want to make it even more decadent? Ask Recipe-GPT for flavor-boosting ingredients like chocolate chips or a swirl of peanut butter. You can also request a less-sweet version for personalized perfection, fast.
AI Help: Suggest flavor enhancements or adjust for sweetness preferences.
Creamy Cheesecake Dump Cake
Experience the luxurious taste of cheesecake in a fraction of the time. This creamy dump cake offers a delightful texture and rich flavor, making it a fantastic and incredibly easy choice when you want something special.
Experiment with fruit toppings using our AI, which might suggest raspberry or blueberry swirls. You can also ask for ingredient substitutions, like low-fat cream cheese. Recipe-GPT provides quick answers to all your baking questions.
AI Help: Suggest fruit pairings or provide ingredient alternatives.
Simple Strawberry Dump Cake
Bright, fruity, and always a crowd-pleaser, this strawberry dump cake blends sweet strawberries with a light cake layer. It’s an ideal dessert for spring and summer gatherings because it’s so quick to put together.
Working with frozen strawberries? Recipe-GPT can adapt the recipe instantly. Ask for ideas to add brightness, like a touch of lemon zest, or find ways to match the recipe to what’s in your pantry. Enjoy fast, tailored results.
Key Ingredients: Strawberry pie filling, white cake mix, butter.
AI Help: Adapt for fresh or frozen fruit, or suggest flavor additions.
Autumnal Pumpkin Dump Cake
Embrace the cozy flavors of fall with this pumpkin dump cake. It features a spiced pumpkin base and a buttery, crumbly cake topping that brings warmth and comfort to your table.
Prefer extra spice? Ask Recipe-GPT to increase the cinnamon or add a touch of ginger. You can also get serving suggestions, like a dollop of whipped cream or ice cream, to create your perfect seasonal treat.
AI Help: Adjust spice levels or suggest serving accompaniments.
The Ultimate 3-Ingredient Dump Cake
Sometimes, less truly is more, and this 3-ingredient dump cake is delicious proof. Incredibly simple to make, it’s the perfect solution for last-minute dessert cravings. You can’t beat the ease of this recipe.
Let Recipe-GPT help you explore endless combinations. Ask for suggestions on different fruit fillings and cake mixes. Want to try pineapple with coconut, or apple with spice? Our AI provides instant creative inspiration for new flavor pairings.
Key Ingredients: Fruit pie filling, dry cake mix, butter.
AI Help: Suggest creative fruit and cake mix pairings for new flavors.
Apple Cinnamon Dump Cake
Enjoy a classic combination with this comforting apple cinnamon dump cake. Featuring tender apples baked under a golden, spiced cake layer, this dessert is like a warm hug—ideal for family dinners or a cozy evening.
Looking for a healthier twist? Recipe-GPT can suggest reducing the sugar or using whole wheat flour. It can also recommend adding chopped nuts for texture, providing practical guidance that simplifies your decisions.
Key Ingredients: Apple pie filling, yellow cake mix, cinnamon, butter.
AI Help: Offer healthier ingredient swaps or suggest textural additions.
Blueberry Lemon Dump Cake
Brighten your day with this zesty blueberry lemon dump cake. Bursting with fresh flavor, it perfectly balances tart lemon and sweet blueberries under a light cake topping.
Recipe-GPT makes it easy to personalize this recipe. Ask how to adjust the tartness with more lemon zest or get suggestions for a different berry if blueberries are unavailable. Get the confidence you need to adapt any dish.
Key Ingredients: Blueberry pie filling, lemon cake mix, butter.
AI Help: Adjust lemon intensity or suggest alternative berries.
Pineapple Coconut Dump Cake
Escape to a tropical paradise with this delightful pineapple coconut dump cake. Combining juicy pineapple and toasted coconut, this wonderfully flavorful dessert is a taste of vacation in every bite.
Using sweetened or unsweetened coconut flakes? Recipe-GPT can adjust the recipe accordingly. It can also suggest adding macadamia nuts for extra crunch, helping you get creative with your pantry items. Think of our AI as your smart cooking companion.
AI Help: Adjust recipes based on specific ingredient types or suggest tropical additions.
How to Use AI for Endless Dump Cake Variations
Professional food photography, photorealistic, high-quality food magazine photo style: A cheerful home cook (real human woman, not AI render) is smiling, looking at a tablet displaying a user-friendly AI recipe generation interface, open in a clean and well-lit home kitchen. Her hands are gently resting on the tablet, which shows text about ‘personalized dump cake variations’. In the soft-focus background, basic baking ingredients or a partially prepared dish are visible, suggesting activity. The focus is on the seamless integration of technology in everyday cooking. Warm, inviting lighting.
Swap Ingredients with AI Suggestions
Ever started a recipe only to realize you’re missing a key ingredient? Recipe-GPT makes cooking more flexible by helping you easily swap ingredients in your favorite dump cake recipes.
This feature lets you use what’s already in your pantry, saving a trip to the store. You can also tailor recipes to your family’s tastes or dietary needs.
Here’s how AI can help you make smart ingredient swaps:
Fruit Filling Alternatives: Don’t have cherry pie filling? The AI can suggest alternatives like blueberry, peach, or apple.
Cake Mix Varieties: Swap yellow cake mix for vanilla, spice, or chocolate. The AI suggests pairings that taste great together.
Flavor Enhancers: Need a nut-free option? The AI can recommend swapping pecans or walnuts for toasted oats or sunflower seeds.
Dairy Swaps: For a dairy-free version, ask for swaps like using coconut oil instead of butter or finding a plant-based cake mix.
Just tell Recipe-GPT what you have, and it will instantly provide delicious, practical substitutions. This makes cooking dump cakes simpler and more convenient.
Generate Custom Flavor Combinations
Dump cakes are incredibly versatile, and Recipe-GPT helps you explore endless flavor possibilities. Our AI acts as your personal recipe creator, generating unique combinations based on your tastes.
Craving something new? Simply describe your ideal dessert, and the AI will offer creative dump cake ideas. You get fresh inspiration without the guesswork.
Consider these exciting ways to create custom dump cake flavors:
Tell Your Preferences: Type in your favorite flavors, like “tropical” or “chocolate and mint,” and the AI will suggest combinations of fruit fillings and cake mixes.
Seasonal Inspirations: Ask for seasonal ideas, such as an “autumnal dump cake with pumpkin” or a “summer berry dump cake.”
Cuisine-Inspired Twists: Explore different culinary influences by trying a “chai spice dump cake” or a “Mexican chocolate dump cake.”
Ingredient-Based Creativity: Use a specific ingredient as your starting point. For example, “create a dump cake using cream cheese and pecans.”
Recipe-GPT transforms your ideas into clear, step-by-step instructions, making personalized dessert creation fast and fun. Enjoy a unique treat tailored just for you!
Get Tips for Different Pan Sizes
Baking can be tricky when a recipe doesn’t match your pan size. Recipe-GPT simplifies this challenge by adjusting dump cake recipes for various pans, ensuring perfect results every time.
Whether you’re baking for a crowd or just a few, the AI offers practical guidance to scale ingredients correctly, giving you more confidence in the kitchen. Scaling recipes accurately can also lead to less food waste [1].
Here’s how Recipe-GPT assists with pan size adjustments:
Adjusting for Smaller Pans: If a recipe calls for a 9×13-inch pan, ask the AI to adapt it for an 8×8-inch pan. It will suggest how to reduce the ingredient amounts.
Scaling for Larger Batches: Need more servings? Ask the AI to double a recipe for a larger crowd, and it will provide the updated ingredient quantities.
Unique Bakeware: Want to use a Bundt pan or individual ramekins? The AI can offer guidance on adjusting butter, cake mix, and filling amounts.
Baking Time Guidance: Different pan sizes often require different baking times. The AI provides estimated cooking durations for your specific pan.
Just ask Recipe-GPT to adapt your dump cake recipe, and it will quickly deliver adjusted instructions to ensure your dessert turns out perfectly every time.
Frequently Asked Questions About Dump Cakes
What is the original dump cake recipe?
The original dump cake recipe is famously simple. The recipe emerged in the 1960s, when convenience cooking was on the rise. The idea was to “dump” ingredients into a pan with minimal fuss.
Typically, it involves:
A can of fruit pie filling (like cherry or peach) as the base.
A box of dry cake mix, usually yellow or white, sprinkled over the fruit.
Melted butter or pats of butter placed on top of the cake mix.
No stirring is required before baking! This method creates a dessert with a gooey, fruit-filled bottom and a cake-like, slightly crisp topping. Food historians often credit brands like Duncan Hines for popularizing this easy dessert concept [2].
Recipe-GPT can help you explore modern twists on this classic. Just ask our AI for “original dump cake variations” to get started!
What do I need for a 3-ingredient dump cake?
A true 3-ingredient dump cake is as straightforward as it sounds, making it perfect for busy evenings or a last-minute dessert. You only need these three items:
One can of fruit pie filling: Cherry, peach, apple, or blueberry are popular choices.
One box of dry cake mix: Yellow or white cake mix works best for most fruit fillings.
One stick (1/2 cup) of butter: This can be melted or cut into small pats.
To prepare it, spread the pie filling in your baking dish. Sprinkle the dry cake mix evenly over the fruit. Finally, pour the melted butter over the top or dot it with butter pats. Bake until golden and bubbly!
With Recipe-GPT, you can easily find new flavor combinations for your 3-ingredient dump cake. Ask for “3-ingredient dump cake with tropical fruit” for a fun twist!
Which cake mix is best for dump cake recipes?
The “best” cake mix depends on your chosen fruit filling and personal preference. However, certain types are exceptionally well-suited for dump cakes:
Yellow Cake Mix: This is a versatile classic. Its rich, buttery flavor complements almost any fruit, from cherries to pineapples.
White Cake Mix: A lighter option, white cake mix allows the fruit flavors to shine. It’s great with brighter fruits like strawberries or blueberries.
Chocolate Cake Mix: This is an excellent choice for pairings with dark cherries, raspberries, or even a can of caramel topping for a decadent treat.
Spice Cake Mix: Ideal for fall-themed dump cakes, this mix pairs perfectly with pumpkin, apple, or pear fillings.
Lemon Cake Mix: For a zesty touch, try lemon cake mix with blueberry, raspberry, or peach pie filling.
Consider the flavor profile you want to achieve. A plain cake mix highlights the fruit, while a flavored mix adds another layer of complexity. Recipe-GPT can suggest the perfect cake mix based on the fruit you have on hand. Just tell our AI your ingredients, and we’ll create personalized dump cake ideas!
What’s the difference between a dump cake and a cobbler?
While dump cakes and cobblers are both delicious fruit desserts, they have key differences in their topping and preparation.
Feature
Dump Cake
Cobbler
Topping Base
Dry boxed cake mix
Biscuit, scone, or cookie-like dough
Preparation
Ingredients are “dumped” and layered without pre-mixing the topping.
Fruit is often sweetened, then topped with spoonfuls or layers of prepared dough.
Topping Texture
Crumbly and cake-like, sometimes slightly crisp where butter melts.
Soft and tender, with a more defined biscuit or doughy texture.
Key Characteristic
Ultimate simplicity and minimal effort.
Often involves making a simple dough from scratch or a mix.
Both desserts deliver warm, comforting fruit flavors. Dump cakes are known for their extreme ease, while cobblers offer a more traditional, home-baked topping. Recipe-GPT can help you explore both! Simply ask our AI for “easy cobbler recipes” or “quick dump cake ideas” for instant inspiration.
The best cherry pie recipe features a rich, sweet-tart filling made from fresh, frozen, or canned cherries, balanced with sugar and a thickener like cornstarch. It’s encased in a flaky, all-butter crust that bakes to a perfect golden brown, creating the ultimate classic American dessert.
There’s nothing quite like the comforting taste of a homemade cherry pie. The perfect blend of sweet and tart cherries in a golden, flaky crust is pure culinary magic. Yet, the idea of baking a pie from scratch can seem intimidating. Many home cooks crave that classic dessert without the stress of a complicated process.
Good news: you’ve found the solution. This guide is dedicated to what we consider the best cherry pie recipe because it’s designed to be simple, straightforward, and incredibly satisfying. We’ll walk you through every step to ensure you achieve a flawless pie every single time. This recipe works beautifully with fresh, frozen, or even canned cherries, making it perfect for bakers of all skill levels.
At Recipe-GPT, our goal is to simplify mealtime decisions, and that includes delightful desserts. While we focus on this classic, remember our AI tools can help personalize your baking. For instance, they can provide quick dietary adjustments or smart ingredient substitutions tailored just for you. Now, get ready to bake an unforgettable cherry pie with confidence.
Why Is This the Best Cherry Pie Recipe?
Ready to bake the best cherry pie recipe you’ve ever tried? We combine timeless techniques with modern AI assistance to ensure you get perfect results. This isn’t just another recipe; it’s a completely new baking experience.
Our recipe creates a perfect balance, featuring a flaky, buttery crust and a delicious sweet-tart cherry filling. It’s the classic flavor you love, perfected for your home kitchen.
But what makes this recipe truly stand out? It’s more than just the ingredients; it’s how Recipe-GPT personalizes the experience for you. We believe baking should be inspiring and easy, so our AI is here to guide you every step of the way.
Here’s why this recipe, powered by Recipe-GPT, stands out:
Perfect Flavor Balance: Our recipe consistently delivers the ideal sweet-tart taste that makes a cherry pie unforgettable.
Flaky, Foolproof Crust: Follow our straightforward instructions for an all-butter crust that comes out golden and flaky every time.
AI-Powered Customization: Recipe-GPT helps you personalize the recipe. For example, you can easily adjust for dietary needs or ingredient availability.
Quick & Practical Guidance: We focus on efficiency, helping you get delicious results without unnecessary fuss.
Confidence in Every Slice: Say goodbye to baking stress. Our guide ensures you bake with ease and confidence.
Turn baking uncertainty into confident success. This recipe moves beyond generic instructions to offer a tailored, delightful experience. Our AI makes sure this isn’t just the “best” recipe, but the best recipe for *you*. You’ll create a show-stopping cherry pie with ease and joy, making this the most accessible and rewarding cherry pie recipe you can find.
What Ingredients Do You Need for Cherry Pie?
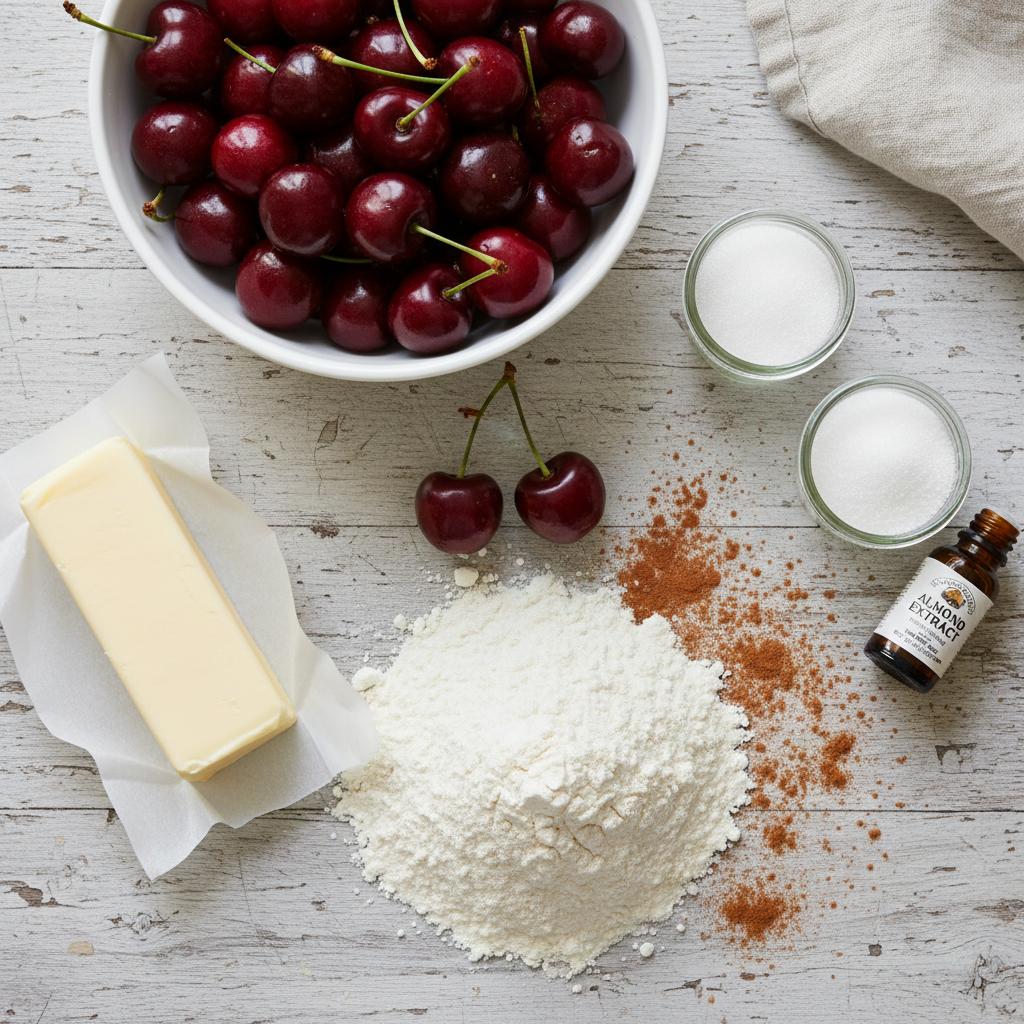
Professional food photography, photorealistic, high-quality food magazine photo style. A meticulously arranged flat lay of fresh, vibrant ingredients for a cherry pie on a rustic, light-colored wooden culinary workspace. Ingredients include a bowl of glistening, dark red fresh cherries with stems, a mound of all-purpose flour, a stick of cold butter, granulated sugar, cornstarch, almond extract, and a sprinkle of cinnamon and nutmeg. Natural soft lighting, shallow depth of field, bright and clean composition, inviting and clear.
Crafting the perfect cherry pie starts with the right ingredients. Recipe-GPT makes this process simple and stress-free by helping you decide exactly what you need. Our AI can even suggest adjustments based on ingredients you already have, ensuring your pie is delicious every time.
For the Perfect Pie Crust
A flaky, tender crust is essential for any great cherry pie. These key ingredients each play a crucial role in creating that irresistible texture.
All-Purpose Flour: This provides the structure for your crust.
Unsalted Butter: Keeping the butter very cold is key to creating beautiful, flaky layers.
Ice Water: This binds the dough while keeping the butter firm for maximum flakiness.
Granulated Sugar: A touch of sugar adds a subtle sweetness to the crust.
Salt: Just a pinch enhances all the other flavors.
Whether you need a gluten-free or vegan option, Recipe-GPT can instantly generate a personalized ingredient list. Our AI takes your dietary needs and preferences into account, making substitutions simple.
For the Sweet & Tart Cherry Filling
The vibrant cherry filling is the star of the show, offering a delightful balance of sweet and tart. You can easily adjust the sweetness to your liking, and Recipe-GPT can help you work with either fresh or frozen cherries.
Cherries: Use fresh or frozen pitted sweet cherries.
Granulated Sugar: This balances the cherries’ tartness. Adjust the amount to your taste.
Cornstarch: This acts as a thickener, ensuring your filling is perfectly set and not runny.
Lemon Juice: A splash brightens the cherry flavor and adds a lovely zest.
Almond Extract (Optional): A classic addition that complements cherries beautifully.
Salt: A small amount rounds out the flavors.
Our AI is ready to assist with any modifications. For instance, if you prefer a less sweet pie, Recipe-GPT can suggest precise sugar reductions. It can also recommend different thickeners if cornstarch isn’t available, simplifying your cooking process.
How to Make the Best Cherry Pie Step-by-Step
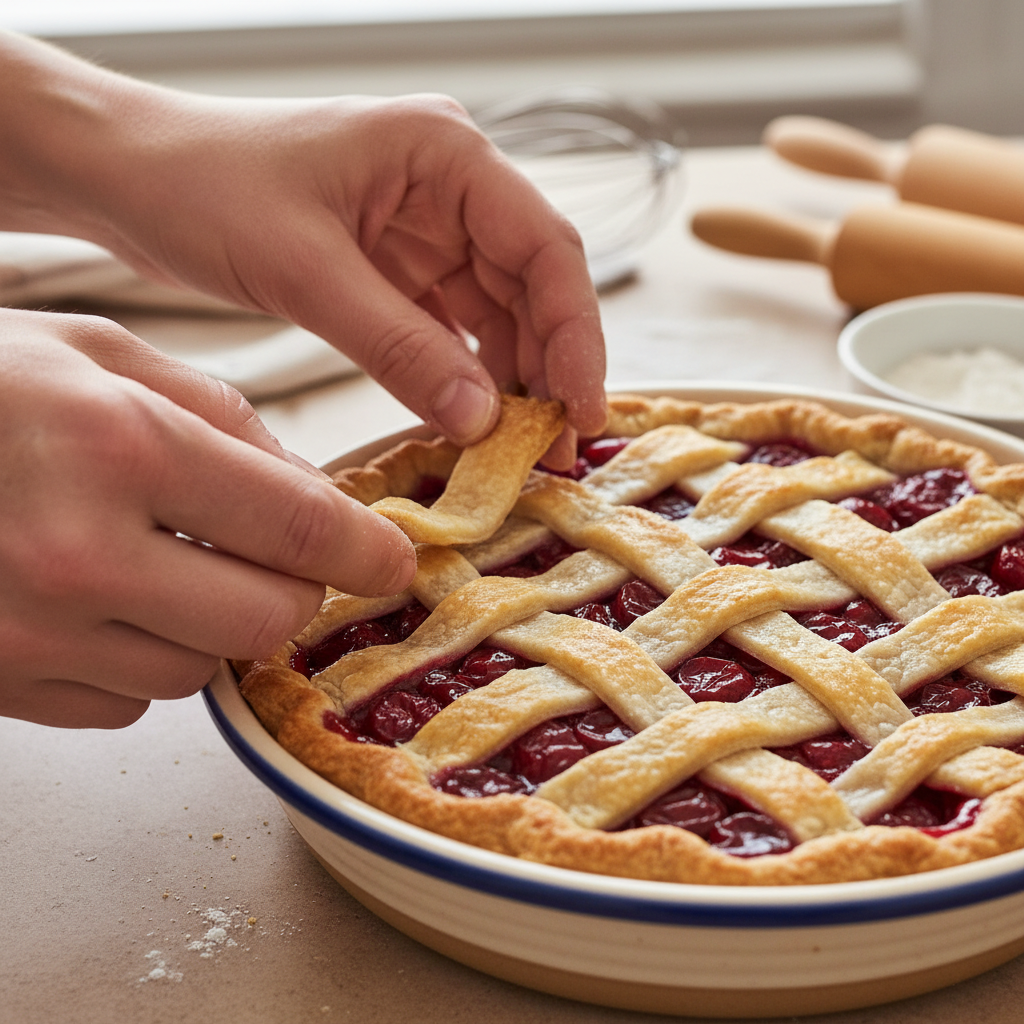
Professional food photography, photorealistic, high-quality food magazine photo style. A close-up shot capturing the moment a home cook’s hands, with slightly floured fingertips, are carefully weaving the final strips of a golden-brown lattice crust over a vibrant, ruby-red cherry pie filling in a ceramic pie dish. The background shows a clean, warm home kitchen counter with a hint of other baking tools blurred. Focus on the hands and the intricate crust, natural lighting.
A delicious pie starts with the perfect crust. Our all-butter recipe creates a flaky, tender base for the cherry filling, and it’s simpler to make than you might think.
To customize this recipe, use Recipe-GPT. Our AI can create a personalized variation in seconds, such as a gluten-free version, to make your meal planning easier.
Combine Dry Ingredients: In a large bowl, whisk together the flour, sugar, and salt. This ensures they are evenly distributed.
Cut in Cold Butter: Add the cold, cubed butter. Using a pastry blender or your fingertips, cut the butter into the flour until the mixture resembles coarse crumbs with some pea-sized pieces still visible. These pockets of butter are what create the flaky layers.
Add Ice Water Gradually: Drizzle in ice water, one tablespoon at a time, mixing gently after each addition. Stop when the dough just comes together. Avoid overmixing to keep the crust tender.
Divide and Chill: Divide the dough in half and flatten each half into a disk. Wrap each disk tightly in plastic wrap and refrigerate for at least 30 minutes. Chilling is crucial, as it helps the butter firm up and prevents the dough from becoming too sticky to roll.
Roll Out the First Crust: On a lightly floured surface, roll out one disk of dough into a 12-inch circle. Carefully transfer it to a 9-inch pie plate. Trim the edges, leaving a 1/2-inch overhang, and place the pie plate in the fridge while you prepare the filling.
Step 2: Make the Cherry Pie Filling
Next, create the vibrant, sweet-tart cherry filling. The key is to balance the fruit’s natural flavor with the right amount of sweetness and a thickener. If you’d like to adjust the sweetness, Recipe-GPT can customize the recipe for you.
Combine Cherries and Sweetener: In a large bowl, combine the fresh or frozen cherries with granulated sugar. If using frozen cherries, there is no need to thaw them first.
Add Flavorings and Thickener: Stir in the lemon juice, vanilla extract, and cornstarch until well combined. The lemon juice brightens the cherry flavor, and the cornstarch thickens the filling as it bakes.
Let it Sit: Allow the mixture to sit for 15-20 minutes. This step draws out the cherry juices and helps the flavors meld together.
Optional Simmer (for extra richness): For a thicker, more developed flavor, transfer the cherry mixture to a saucepan. Cook over medium heat for 5-7 minutes, stirring constantly, until it just begins to thicken. Let it cool completely before using. This step is especially helpful for very juicy cherries.
Step 3: Assemble Your Pie
Now it’s time to assemble the pie. These straightforward steps will ensure your pie looks great and is sealed properly to prevent leaks.
Preheat Oven and Prepare Crust: Preheat your oven to 400°F (200°C). Remove the chilled pie plate with the bottom crust from the refrigerator.
Fill the Crust: Pour the prepared cherry filling into the bottom crust and spread it evenly.
Add Top Crust: Roll out the second disk of dough. You can place it over the filling as a solid top crust or cut it into strips for a lattice design. If using a solid top, cut a few slits in the center to allow steam to escape.
Seal the Edges: Place the top crust over the filling. Trim any excess dough, then crimp the edges to seal them. You can use your fingers or a fork to create a decorative edge. This prevents the filling from bubbling out during baking.
Egg Wash (Optional): For a golden, shiny crust, brush the top with an egg wash (one egg yolk beaten with a tablespoon of water).
Step 4: Bake to Golden Perfection
The final step is baking. Following these guidelines will give you a bubbly, thick filling and a perfectly crisp, golden-brown crust.
Start Hot: Place the pie on a baking sheet to catch any drips and bake for 15 minutes at 400°F (200°C). This initial high heat helps set the crust and starts thickening the filling. Many bakers agree this high-heat start is key to preventing a soggy bottom [1].
Reduce Heat and Continue Baking: After 15 minutes, reduce the oven temperature to 375°F (190°C). Continue baking for another 45-55 minutes.
Check for Doneness: The pie is done when the crust is deeply golden brown and the filling is thick and bubbly. If the crust starts to brown too quickly, loosely cover the edges with aluminum foil.
Cool Completely: This step is crucial! Let the pie cool completely on a wire rack for at least 3-4 hours. Cooling allows the filling to set, which ensures you can cut clean, non-runny slices.
How Can AI Help Personalize Your Cherry Pie?
Adjusting for Dietary Needs
Crafting the perfect cherry pie often means catering to specific diets, but adapting a classic recipe can be tricky. Recipe-GPT makes this easy by taking your dietary needs into account.
Our AI understands common restrictions and quickly reworks the ingredients for you. The result is less stress and a more delicious pie.
Consider these common dietary adjustments for your cherry pie:
Vegan-Friendly: Replace butter with plant-based shortening or vegan butter in the crust. Use a cornstarch slurry instead of egg wash for glazing.
Gluten-Free: Opt for a pre-made gluten-free pie crust. Alternatively, our AI can generate a homemade gluten-free crust recipe using specialized flours.
Low-Sugar: Reduce the amount of sugar in the filling. Use a natural sweetener like erythritol or stevia for a healthier option. Recipe-GPT can calculate the exact amounts.
Nut-Free: Ensure all ingredients are free from nuts. This is crucial for allergy sufferers.
Recipe-GPT instantly provides tailored guidance, so you get a personalized cherry pie recipe every time. Enjoy a pie that you know fits your lifestyle.
Finding Ingredient Substitutions
Ever started baking only to realize you’re missing a key ingredient? Recipe-GPT helps you avoid that last-minute dash to the store by suggesting smart substitutions.
It helps you use what you already have, saving both time and money. Simply tell Recipe-GPT what’s missing, and it will offer practical alternatives.
Here are some ways Recipe-GPT can help with substitutions:
Fruit Variations: No fresh cherries? Ask for a recipe using frozen cherries, canned cherries, or even a different fruit like mixed berries or apples.
Crust Alternatives: If you’re short on time for a homemade crust, Recipe-GPT can suggest using a store-bought crust. It can also suggest a graham cracker or cookie crust for a different twist.
Sweetener Swaps: Out of granulated sugar? Our AI can suggest using brown sugar, honey, or maple syrup. It also advises on adjusting liquid content if needed.
Thickener Changes: If you don’t have cornstarch, Recipe-GPT can recommend flour or tapioca starch. It will guide you on the correct quantities for a perfectly thick filling.
Recipe-GPT makes cooking flexible and fun by providing instant, practical solutions. You can confidently create your cherry pie with the ingredients you have on hand.
Tips for a Flawless Cherry Pie Every Time
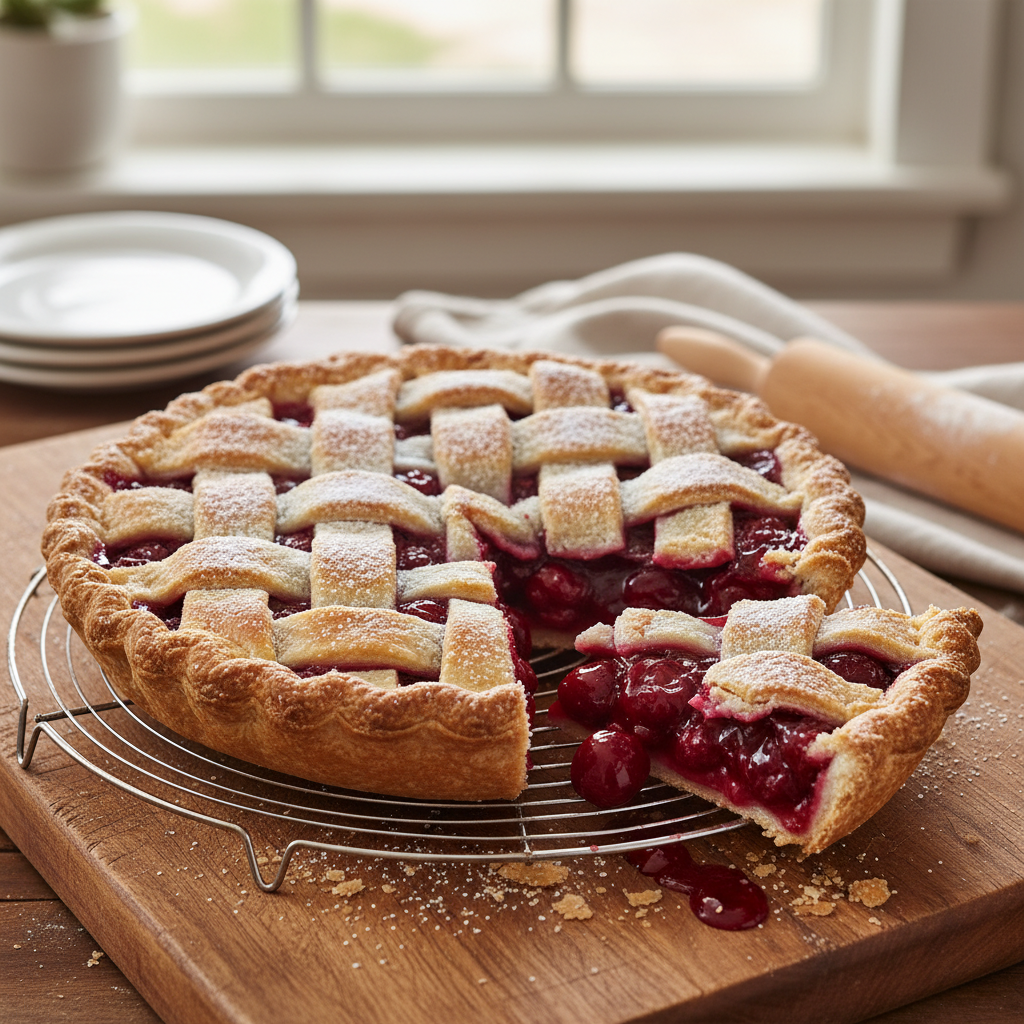
Professional food photography, photorealistic, high-quality food magazine photo style. A perfectly baked, whole cherry pie with a beautifully golden-brown, intricately woven lattice top, showcasing a slight bubbling of the cherry filling peeking through. The pie is presented warm on a simple white ceramic plate, with a large scoop of creamy vanilla bean ice cream gently melting on one side. The setting is a cozy, inviting home kitchen table, with a soft, blurred background. Warm, natural lighting, rich colors, appealing texture, inviting and delicious presentation.
How to Prevent a Soggy Bottom
A soggy pie bottom is a common baking challenge, but you can achieve a wonderfully crisp crust every time. These simple tricks make all the difference.
Recipe-GPT can even suggest specific methods for your ingredients. It can personalize advice based on the type of flour or fat you use.
Blind Bake Your Crust: This is a crucial first step. Blind baking partially cooks the crust before you add the filling, creating a barrier against moisture.
Egg Wash the Crust: After blind baking, brush a thin layer of beaten egg white onto the crust and bake for a few more minutes until set. This creates a waterproof seal.
Use a Hot Baking Surface: Place your pie on a preheated baking sheet or pizza stone. This delivers immediate, intense heat to the bottom of the crust, helping it crisp up.
Thicken Your Filling Properly: Make sure your cherry pie filling isn’t too watery. Use a thickener like cornstarch or tapioca to get the right consistency. Recipe-GPT can suggest the perfect amount to use.
Aluminum Foil Shield: If the top of your pie browns too quickly, loosely tent it with foil. This protects the edges and allows the bottom to cook through completely.
By following these steps, you will enjoy a firm, flaky base. Say goodbye to soggy pie crusts forever!
Getting the Perfect Lattice Top
A beautiful lattice top doesn’t just look impressive—it’s also functional. It allows steam to escape, which helps prevent the filling from bursting.
Don’t worry if you’re a beginner. Recipe-GPT can provide easy, visual instructions for crafting a perfect lattice. It makes complex techniques simple to follow.
Chill Your Dough: Cold pie dough is much easier to handle and less likely to stick or tear. For best results, chill your rolled-out dough strips for 10-15 minutes before weaving.
Cut Even Strips: For a neat, professional-looking weave, use a ruler and a pastry wheel or knife to cut strips of uniform width.
Lay the Foundation: To start, lay half of your dough strips parallel to each other across the pie filling, leaving a small space between each one.
Begin Weaving: Fold back every other parallel strip. Lay a new strip perpendicularly across the strips you didn’t fold. Then, unfold the strips you folded back over the new one.
Continue the Pattern: Next, fold back the alternate set of parallel strips. Add another perpendicular strip and repeat this pattern until the entire pie is covered.
Trim and Crimp: Once the lattice is complete, trim any excess dough from the edges. Crimp the edges to firmly seal the lattice to the bottom crust.
Egg Wash and Sugar: For a professional finish, brush the lattice with an egg wash for a golden sheen. A sprinkle of coarse sugar also adds a delightful sparkle and crunch.
A stunning lattice top is within your reach. Impress your family and friends with this classic finish.
Storing Your Cherry Pie
Proper storage is key to keeping your delicious cherry pie fresh and safe to eat.
Recipe-GPT can even offer ideas for using up leftover pie. It might suggest a breakfast parfait or a deconstructed dessert!
Cool Completely: First, always let your pie cool fully before storing it. A warm pie creates condensation, which leads to a soggy crust.
Room Temperature (Short-Term): Fruit pies with high sugar content, like cherry, can be stored at room temperature for up to two days. Simply keep it loosely covered with foil or plastic wrap.
Refrigeration (Longer-Term): If you need to store the pie for longer, or if your kitchen is warm, place it in the refrigerator. Covered tightly, it will stay fresh for up to four days.
Freezing for Later: To freeze a whole pie, wrap it tightly in plastic wrap, then in a layer of foil. It can be frozen for up to 3 months [2]. Thaw it overnight in the refrigerator and reheat in a 350°F (175°C) oven until warmed through.
Individual Slices: For leftover slices, store them in an airtight container. This helps maintain freshness and prevents the pie from absorbing odors from other foods.
Enjoy your homemade cherry pie for days to come. Recipe-GPT helps you make the most of every delicious creation.
Frequently Asked Questions
What is the best cherry pie recipe with canned cherries?
Using canned cherries is a fantastic shortcut for a quick and delicious pie. This simple swap saves you time, especially on busy weeknights. Recipe-GPT can also help you tailor recipes to pantry staples like canned fruit.
To make a great pie with canned cherries, follow these simple steps:
Drain well: First, drain the canned cherries thoroughly. You can reserve some of the juice to adjust the filling’s consistency later.
Adjust sweetness: Canned cherries often come in a sweet syrup, so you’ll need less sugar than with fresh cherries. Taste them first, then add sugar gradually until you reach your desired sweetness.
Thicken: To thicken the filling, mix cornstarch or flour with a little reserved cherry juice or water to create a slurry. Stir this into your drained cherries, and it will thicken as the pie bakes.
Flavor boost: A touch of almond extract or vanilla can enhance the cherry flavor. A pinch of cinnamon or nutmeg also works wonderfully.
Use your crust: Pour the prepared filling into your favorite pie crust and bake as directed for a classic cherry pie.
For more variations, Recipe-GPT can help. Just state that you have canned cherries, and it will suggest precise measurements and flavor combinations, making your pie-making process easy.
What is the best cherry pie recipe from scratch?
For the best results, our featured “Ultimate Cherry Pie Recipe” is the top choice for a scratch-made pie. Making a pie from scratch offers unparalleled freshness and flavor, as you control every ingredient to ensure a perfect balance of sweet and tart.
The key to a top-tier scratch pie involves two main components:
Homemade crust: An all-butter pie crust offers a flaky texture and rich flavor. The extra effort is worth it for a superior pie experience.
Fresh cherry filling: Using fresh, ripe cherries ensures the most vibrant taste. This also allows you to tailor the sugar and thickener to your exact preference.
Our step-by-step guide walks you through the entire process. For example, using fresh fruit ensures a brighter, more natural cherry flavor [3]. If you’re out of a specific ingredient, Recipe-GPT can instantly suggest clever substitutions for your crust or filling, helping you bake from scratch with confidence.
How do you make an old fashioned cherry pie recipe?
An old-fashioned cherry pie highlights classic, simple flavors and traditional techniques. The goal is to let the natural taste of the cherries shine through without any fancy additions or complicated steps.
To capture that nostalgic “old-fashioned” feel:
Simple ingredients: Stick to basic filling ingredients. Fresh or frozen cherries, sugar, a thickener like cornstarch or flour, and a hint of almond extract or vanilla are all you need.
Classic double crust: Most old-fashioned pies feature a full top crust, not just a lattice. This seals in moisture and helps create a lovely golden-brown finish.
Balanced sweetness: Aim for a perfect balance between the cherries’ natural tartness and the added sugar. Adjust to your taste, but avoid making it overly sweet.
Gentle baking: Bake slowly until the crust is golden and the filling is bubbly. This method ensures even cooking and a tender crust.
Recipe-GPT can help you explore “old-fashioned” variations. Simply ask for a traditional cherry pie, and it will provide straightforward, authentic guidance. It makes rediscovering classic recipes easy and fun.
What’s the best way to make a cherry pie filling recipe?
The secret to the best cherry pie filling is balancing flavors and achieving the right consistency. A great filling is sweet yet tart with a thick, glossy texture that isn’t too runny or stiff.
Here’s how to make a truly outstanding filling:
Choose your cherries: Fresh sour cherries are ideal for a classic flavor. If you use sweet cherries, you should reduce the sugar. Frozen cherries also work well; just thaw and drain them first.
Balance flavors: Combine sugar with the cherries. A touch of lemon juice will brighten the flavor, while almond extract or vanilla adds depth and complexity.
Thicken correctly: Use an excellent thickener like cornstarch or tapioca starch. To prevent lumps and ensure a smooth consistency, mix it thoroughly with the fruit and sugar before cooking.
Cook gently: Simmer the filling on the stovetop, stirring constantly to prevent sticking, until it thickens and becomes glossy. The mixture should bubble for a minute or two to fully activate the thickener.
Cool completely: Always let the filling cool completely before pouring it into your pie crust. This step is crucial for preventing a soggy bottom and helping the pie set beautifully.
Recipe-GPT is your go-to for customizing fillings. Whether you need a low-sugar option, want to use different spices, or need to adapt for a specific cherry type, our AI can instantly provide personalized, step-by-step instructions. This makes exploring new variations simple and stress-free.
A classic recipe for peach cobbler involves a sweet peach filling, often made from canned or fresh peaches, baked under a simple, biscuit-like batter or topping. The key ingredients are peaches, sugar, butter, flour, and milk, which combine to create a warm, bubbling, and comforting dessert perfect for any occasion.
There’s nothing quite like the comforting aroma of a warm, bubbly homemade peach cobbler. This classic dessert brings instant joy, but the thought of peeling fresh peaches can be daunting. What if you could enjoy a delicious, easy peach cobbler without the complicated prep?
At Recipe-GPT, we believe mealtime decisions should be simple and convenient. That’s why our smart AI has perfected a peach cobbler recipe easy enough for anyone by using a key pantry staple: canned peaches! Forget the fuss of elaborate prep. Our AI-driven approach streamlines everything to deliver a tailored recipe that fits your busy schedule.
Ready to turn simple ingredients into an unforgettable dessert? This recipe for peach cobbler is designed for speed and satisfaction, delivering a golden, bubbling masterpiece without the stress. Dive into our guide and discover one of the best peach cobbler recipes made with canned peaches you’ve ever tasted.
Why You’ll Love This AI-Perfected Peach Cobbler Recipe
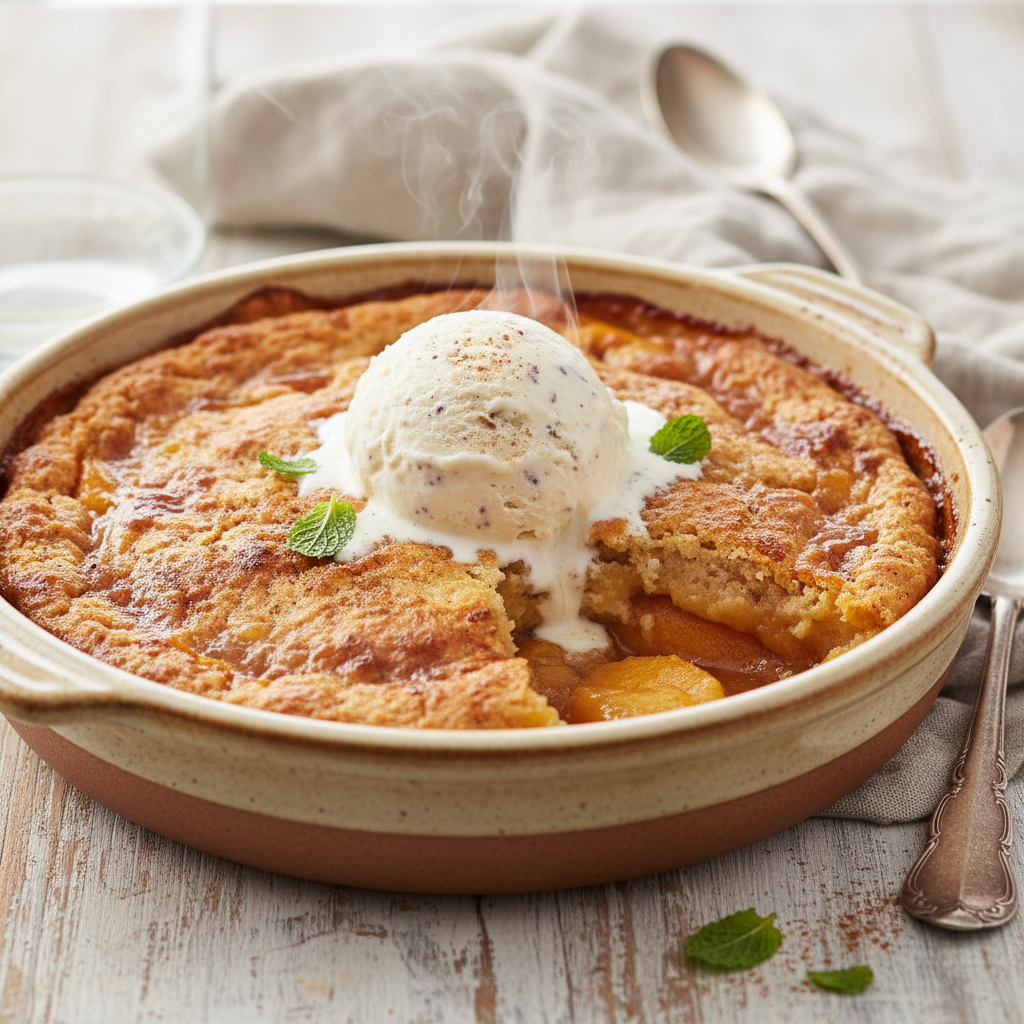
Professional food photography of a whole, freshly baked peach cobbler in a rustic ceramic baking dish, just out of the oven. The cobbler features a golden-brown, slightly craggy, biscuit-like topping with a subtle dusting of sugar, and hot, bubbling, caramelized peach filling peeking through the edges. The light should be warm and inviting, highlighting the textures. The background is softly blurred to suggest a cozy home kitchen environment. Photorealistic, high-quality food magazine photo style, with a shallow depth of field.
Discover your new favorite dessert with our AI-perfected peach cobbler. This recipe makes baking an absolute breeze, combining the warmth of homemade comfort with smart, streamlined guidance.
Recipe-GPT helps you whip up a delightful treat every time, taking the guesswork out of dessert. Our recipe is designed for maximum flavor with minimal effort, ensuring delicious results.
Why this Cobbler is a Game-Changer
This isn’t just any peach cobbler. Our AI has refined it for ultimate ease and deliciousness. Here’s why you’ll love it:
Super Quick & Easy: Using canned peaches means no peeling or pitting, which saves you valuable time. It’s the perfect easy peach cobbler recipe for busy days.
AI-Optimized for Success: Our Recipe-GPT technology provides clear, simple steps that reduce common baking mistakes, helping you achieve a consistently perfect result.
Budget-Friendly Ingredients: Since this recipe uses economical canned peaches, it’s accessible to everyone. You can create a luxurious dessert without breaking the bank.
Perfect for Beginners: If you’re new to baking, this recipe’s straightforward instructions will build your confidence and help you create a beautiful dessert.
Reliably Delicious: Every bite offers a delightful combination of warm, sweet peaches and a tender, golden topping. This recipe is a guaranteed crowd-pleaser.
Tailored to Your Needs: Recipe-GPT also offers personalized recipe suggestions. You can quickly adjust serving sizes or get smart substitutions based on the ingredients you have on hand.
Stress-Free Meal Planning: Our AI takes the guesswork out of baking, turning mealtime indecision into clear, personalized ideas so you can enjoy more time with loved ones.
Enjoy a simple, fast, and incredibly satisfying peach cobbler with canned peaches, all thanks to Recipe-GPT. Get ready to bake with confidence!
What are the three ingredients in peach cobbler?
The Core Ingredients for a Classic Cobbler
Making a delicious peach cobbler might seem complex, but this classic dessert is surprisingly simple at its core. It relies on just a few key elements, which our AI-powered recipes help you master.
Every great peach cobbler is built on three main components:
Flavorful Fruit: Peaches are the star here! Whether fresh, frozen, or canned, they provide that sweet, juicy base.
Sweet & Saucy Base: This typically includes sugar, spices, and a thickening agent. It transforms the fruit into a rich, comforting filling.
A Doughy Topping: This can be a biscuit-like dough, a cake-like batter, or even crumbles. It bakes up golden and tender, contrasting beautifully with the fruit.
Recipe-GPT uses these core components to craft personalized, easy-to-follow instructions, turning the question of “what to cook” into a simple, enjoyable answer.
Full Ingredient List for Our Recipe
Designed for convenience, our easy peach cobbler recipe uses canned peaches to save you time without sacrificing flavor. Here’s everything you’ll need:
For the Peach Filling:
2 large cans (29 ounces each) sliced peaches in heavy syrup, undrained
½ cup granulated sugar (adjust to taste)
¼ cup all-purpose flour
1 teaspoon ground cinnamon
¼ teaspoon ground nutmeg
1 teaspoon vanilla extract
2 tablespoons unsalted butter, cut into small pieces
This “peach cobbler recipe easy” approach delivers maximum flavor with minimal effort, making it the perfect inspiration for a quick and delicious dessert.
AI-Powered Ingredient Swaps & Substitutions
Don’t have every ingredient on hand? That’s where Recipe-GPT truly shines. Our AI provides intelligent substitutions and personalized recipe variations based on what’s already in your pantry, making meal planning simple and stress-free.
For example, consider these common swaps for your peach cobbler:
Fruit Alternatives: No peaches? Ask Recipe-GPT to adapt the recipe for berries, apples, or mixed fruit. It easily generates new ideas.
Flour Choices: If you need a gluten-free option, our AI can suggest suitable flour blends to meet your dietary preferences.
Dairy Swaps: For milk or butter, almond milk or plant-based butter are great alternatives. Our AI can guide you through these changes.
Sweeteners: You can often swap granulated sugar for brown sugar or a sugar substitute. The AI can tell you how to adjust quantities.
Spice Variations: Love ginger or cardamom? Our AI can suggest creative spice blends to elevate your cobbler.
With Recipe-GPT, you can confidently use the ingredients you have on hand. This flexibility turns cooking into an enjoyable experience and empowers you to try diverse recipes with expert AI guidance.
Your Step-by-Step Guide to Homemade Peach Cobbler
Photorealistic professional food photography depicting a close-up of a home cook’s hands, with clean, well-manicured nails, expertly arranging individual pieces of biscuit-like dough topping over a shimmering, juicy canned peach filling in a glass baking dish. The scene is set in a bright, clean home kitchen culinary workspace, with natural light illuminating the ingredients. Focus on the textures of the dough and the glistening peaches. High-quality food magazine photo style, from a slightly overhead perspective.
Step 1: Prepare the Peach Filling
First, create the sweet peach base for your cobbler. This step is especially simple if you’re using canned peaches.
Drain the Peaches: Open two (15-ounce) cans of sliced or diced peaches. Drain them well, but reserve about a quarter cup of the liquid. This prevents the filling from becoming too watery.
Combine Ingredients: In a large mixing bowl, gently mix the drained peaches with 1/2 cup of granulated sugar, 1/4 teaspoon of ground cinnamon, and a pinch of nutmeg.
Add Thickener: In a small bowl, stir 1 tablespoon of cornstarch into the reserved peach liquid until it dissolves. This slurry will help thicken the filling as it bakes.
Mix Gently: Pour the cornstarch slurry over the peaches and fold everything together until evenly coated. Recipe-GPT can instantly suggest variations, like adding a touch of ginger or cardamom, to match your flavor preferences.
Step 2: Mix the Cobbler Topping
Now, let’s mix the simple, golden-brown topping. This batter comes together in just a few minutes.
Whisk Dry Ingredients: In a separate medium bowl, whisk together 1 1/2 cups of all-purpose flour, 1/2 cup of granulated sugar, 1 tablespoon of baking powder, and 1/4 teaspoon of salt.
Add Butter: Cut 1/2 cup (1 stick) of cold, unsalted butter into small cubes. Using your fingertips or a pastry blender, work the butter into the flour mixture until it resembles coarse crumbs.
Stir in Milk: Gradually pour in 1/2 cup of milk (dairy or non-dairy works well) and stir just until the dry ingredients are moistened. Do not overmix; a few lumps are fine.
Customization Tip: Recipe-GPT can offer quick substitutions. For instance, it can suggest almond milk for a dairy-free option or a gluten-free flour blend if you have dietary needs.
Step 3: Assemble Your Cobbler
You’re almost ready to bake. Assembling the cobbler is a quick and easy process.
Preheat Oven: Preheat your oven to 375°F (190°C).
Prepare Baking Dish: Lightly grease a 2-quart baking dish (an 8×8 or 9×9-inch pan works well).
Add Peach Filling: Pour the prepared peach filling into the bottom of the baking dish and spread it evenly.
Top with Batter: Spoon dollops of the cobbler topping over the peach filling. There’s no need to spread it perfectly, as the topping will expand and bake together into a classic, rustic crust.
Step 4: Bake to Golden Perfection
It’s time for the final step! Your kitchen is about to be filled with the incredible aroma of freshly baked peach cobbler.
Bake Until Golden: Place the baking dish in the preheated oven and bake for 30 to 35 minutes.
Check for Doneness: The cobbler is ready when the topping is golden brown and the filling is bubbling around the edges. You can also insert a wooden skewer into the topping; it should come out mostly clean.
Cool Slightly: Remove the cobbler from the oven and let it cool on a wire rack for at least 10 to 15 minutes before serving. This allows the filling to set.
AI Baking Assistant: Recipe-GPT can help fine-tune your baking. If you use a different size dish, it can instantly adjust baking times for optimal results. Enjoy your homemade peach cobbler!
What are the most common mistakes when making peach cobbler?
Avoiding a Soggy Bottom
A soggy cobbler bottom is a common mistake that can ruin an otherwise perfect dessert. This happens when the crust absorbs trapped moisture from the fruit filling, preventing it from becoming crisp.
To avoid a soggy bottom, consider these simple tips:
Drain Peaches Well: If using canned peaches, drain them thoroughly to remove extra syrup. However, avoid rinsing them unless your easy peach cobbler recipe specifically instructs you to.
Preheat Your Oven: A hot oven from the start is crucial. It helps the crust cook quickly, creating a barrier against moisture from the peaches.
Bake Long Enough: Follow the baking time in your homemade peach cobbler recipe. The crust needs to be golden brown to ensure it’s fully cooked and crisp.
Recipe-GPT helps you avoid this issue with AI-powered recipes designed for success. They provide precise draining instructions for peach cobbler with canned peaches, ensuring a crisp, delicious base every time.
Fixing a Runny Filling
A runny peach filling is another frequent disappointment, preventing your cobbler from holding its shape. This usually happens when the peaches release too much liquid or the recipe lacks enough thickener.
Here’s how to ensure a perfectly spoonable filling:
Use a Thickener: Most best peach cobbler recipes call for cornstarch or flour to absorb excess liquid. Be sure to use the recommended amount [1].
Drain Canned Peaches: As mentioned, draining canned peaches is key. Removing excess liquid from the start allows the thickener to work more effectively during baking.
Briefly Cook the Filling: For extra insurance, briefly cook the peach filling on the stovetop. Just a few minutes helps release liquid, so the thickener can work more efficiently before you bake.
Recipe-GPT can adapt your easy cobbler recipe with intelligent suggestions. It provides optimal thickener amounts and offers quick substitutions, like swapping flour for cornstarch, making it effortless to perfect your filling.
Ensuring a Perfectly Baked Topping
A golden, crisp, and inviting topping is the hallmark of a great cobbler. If yours comes out pale, doughy, or burnt, the issue is often related to oven temperature or baking time.
Achieve that ideal topping for your peach cobbler with canned peaches with these simple adjustments:
Preheat Fully: Always preheat your oven to the correct temperature. This ensures even heat distribution from the very beginning.
Even Spreading: Spread your cobbler topping evenly over the peaches to promote uniform baking and browning.
Watch for Color: Bake until the topping is a beautiful golden brown and feels firm to the touch.
Check for Doneness: The peach filling should be visibly bubbling around the edges, indicating it’s hot and cooked throughout.
Tent if Browning Too Fast: If the topping browns too quickly, cover it loosely with aluminum foil. This slows the browning process while still allowing the filling to cook thoroughly.
Recipe-GPT fine-tunes baking instructions for you by considering common oven variations. This personalized guidance helps ensure your easy peach cobbler turns out perfectly, with consistent and delicious results every time.
Can I substitute canned peaches for fresh in cobbler?
Using Canned Peaches (The Easiest Way)
Absolutely! Using canned peaches isn’t just a substitute—it’s often the easiest and fastest way to make a delicious peach cobbler.
Our recipe for peach cobbler with canned peaches embraces this convenience, making it perfect for busy home cooks.
Canned peaches come already peeled, pitted, and sliced. They are also packed in syrup or juice, which adds natural sweetness and flavor.
Recipe-GPT can quickly generate an easy peach cobbler recipe using ingredients you already have, including canned fruit.
Here’s why canned peaches shine in cobblers:
Time-Saving: With no peeling or pitting needed, you can cut down your prep time significantly.
Consistent Flavor: They offer a reliable sweetness and texture, regardless of the season.
Year-Round Availability: Enjoy homemade peach cobbler anytime, even when fresh peaches are out of season.
Easy Prep: Just drain and use. Some recipes even suggest using a little of the syrup for extra flavor.
We recommend choosing peaches packed in light syrup or juice to help control the overall sweetness of your cobbler.
Adapting the Recipe for Fresh Peaches
If fresh peaches are in season, you can certainly use them. Many people prefer their vibrant flavor and firmer texture.
However, fresh peaches require a bit more preparation. Recipe-GPT can help adjust the recipe steps for you seamlessly.
Here’s how to prepare fresh peaches for your cobbler:
Choose Ripe Peaches: Select peaches that are fragrant and slightly soft to the touch.
Blanch and Peel: Briefly place peaches in boiling water for 30-60 seconds, then transfer them to an ice bath. The skins should slip off easily.
Slice: Pit the peaches and slice them into even, ½-inch thick pieces.
Sweeten and Cook: Add sugar, spices, and a thickener like cornstarch. Cook the mixture gently on the stovetop first to soften the peaches and create a flavorful syrup.
This pre-cooking step is crucial, as it ensures your peaches will be tender and prevents the filling from becoming watery.
Recipe-GPT can personalize your peach cobbler recipe for fresh peaches by suggesting the right amount of sugar and correct cooking times. [2]
How to Make Peach Cobbler with Frozen Peaches
Frozen peaches are another fantastic option, offering a great middle ground between fresh and canned.
They are usually pre-sliced and ready to use, and they often capture the taste of peak-season fruit.
When using frozen peaches, keep these tips in mind:
Thaw or Not: You can thaw them partially or fully before use, though some recipes allow you to add them directly to the filling.
Drain Excess Liquid: Frozen peaches release a lot of water as they cook, so be sure to drain any excess liquid after thawing to prevent a runny filling.
Adjust Thickener: You may need to add extra cornstarch or flour to your filling to absorb the additional moisture.
Flavor Boost: Since frozen peaches can sometimes taste milder, consider adding a touch more spice, like cinnamon or nutmeg.
Recipe-GPT can instantly generate a peach cobbler recipe tailored for frozen peaches, accounting for moisture content and cooking times.
With quick, personalized suggestions, you can easily make a delicious homemade peach cobbler no matter which type of peaches you have on hand.
How to Serve and Store Your Peach Cobbler
Professional food photography of a perfectly portioned slice of warm peach cobbler on a simple white dessert plate. A scoop of rich vanilla ice cream is gently melting on top of the cobbler, creating a luscious contrast. The peaches are tender and glistening, and the golden-brown crust is slightly crisp. The background is softly blurred, focusing entirely on the delicious dessert. Photorealistic, high-quality food magazine photo style, close-up shot, inviting and decadent.
Best Toppings for Peach Cobbler
A great peach cobbler is delicious on its own, but the right topping can make it unforgettable. Whether you prefer a classic pairing or something new, a finishing touch elevates your dessert.
Consider these popular choices:
Vanilla Ice Cream: A timeless favorite, cold and creamy vanilla ice cream melts beautifully over the warm cobbler.
Fresh Whipped Cream: Light and airy, homemade whipped cream adds a touch of elegance. For best results, sweeten it lightly.
Custard Sauce: For a rich and smooth counterpoint, try a warm vanilla custard—a common choice in many regions.
Caramel Drizzle: A swirl of caramel sauce adds another layer of sweetness that pairs wonderfully with peaches.
Chopped Nuts: Toasted pecans or walnuts add a delightful crunch and a hint of savory flavor.
A Dusting of Cinnamon or Nutmeg: For a simple finish, a light sprinkle of warm spice enhances the natural peach flavors.
Need more ideas? Recipe-GPT can suggest creative pairings based on your pantry or dietary needs. Just ask our AI for personalized recommendations to make your dessert decision simple.
Refrigeration and Storage Tips
Proper storage is key to keeping your homemade peach cobbler fresh and delicious. Follow these simple tips to enjoy it for days to come—a helpful strategy for busy families and meal planners.
For best results, follow these steps:
Cool Completely: Before storing, allow the cobbler to cool completely at room temperature for 2-3 hours. Covering it while still warm creates condensation and results in a soggy topping.
Cover Tightly: Once cool, cover the baking dish securely with plastic wrap, aluminum foil, or an airtight lid.
Refrigerate Promptly: Store the covered cobbler in the refrigerator, where it will stay fresh for up to 3-4 days [3].
Reheating: To reheat, warm individual servings in the microwave. Alternatively, you can place the entire cobbler in a 300°F (150°C) oven until heated through.
For longer storage, you can freeze your peach cobbler. Wrap the cooled dish tightly in plastic wrap and then a layer of foil. It will keep in the freezer for up to 2-3 months. Thaw it overnight in the refrigerator before reheating.
Recipe-GPT can also support your meal planning. Our AI can help you manage leftovers or suggest new ways to enjoy your peach cobbler, making mealtime decisions easy and efficient.
Frequently Asked Questions
Should I drain canned peaches for cobbler?
Yes, for most peach cobbler recipes, you should drain the canned peaches. This simple step is key to getting the right consistency in your final dish.
Draining the peaches prevents the filling from becoming too watery, which can lead to a soggy bottom. This ensures your cobbler topping bakes up golden and crisp.
However, you don’t have to drain them completely. A small amount of the syrup can add extra flavor and create a saucier filling. If you’re unsure how much syrup to keep, Recipe-GPT can help you adjust the sauce thickness to match your preference.
What can I make with a can of peaches?
Canned peaches are incredibly versatile, making them a pantry staple for quick desserts and other dishes. If you need inspiration, Recipe-GPT can generate personalized ideas for you.
Simply tell the AI you have “canned peaches,” and it will suggest a range of delicious options to save you time in the kitchen. Here are a few popular uses:
Quick Desserts: Besides cobbler, think crumbles, tarts, or a simple peach compote over ice cream.
Breakfast Boosts: Swirl peaches into oatmeal, yogurt parfaits, or pancake batter for a fruity start.
Smoothies: Blend canned peaches with yogurt and a splash of juice for a refreshing drink.
Savory Pairings: Believe it or not, peaches can complement savory dishes like pork or chicken, adding a touch of sweetness.
Recipe-GPT also tailors its suggestions to your dietary needs and any other ingredients on hand, providing endless meal ideas created just for you.
Should I add lemon juice to my canned peaches?
Yes, adding a splash of lemon juice to canned peaches is an excellent way to enhance their flavor. This simple step can make a big difference in the final taste of your cobbler or dessert.
Here’s why lemon juice is so beneficial:
Brightens Flavor: Lemon juice cuts through the sweetness of canned peaches. It adds a fresh, zesty note that elevates the overall taste profile.
Enhances Natural Peach Taste: It subtly brings out the natural fruitiness of the peaches, making them taste more vibrant.
Because small adjustments can lead to delicious results, Recipe-GPT often includes simple flavor enhancers in its recipes. Our AI can also suggest complementary additions, like a pinch of cinnamon or nutmeg, based on your preferences.
Cakes and pies are classic baked desserts suitable for celebrations or simple weeknight treats. This guide provides over 50 easy recipes for home bakers, including no-bake cheesecakes, simple apple pies, classic carrot cakes, and quick cobblers, all designed to be customized using AI for your specific tastes and ingredients.
There’s nothing quite like a freshly baked cake or a perfectly chilled pie. But let’s be honest—dreaming of that decadent slice is often easier than actually baking it. It can be tricky to find the right recipe to fit your time, ingredients, and cravings, whether you’re a seasoned pro or just starting. After all, who doesn’t want a show-stopping dessert without all the stress?
That’s where Recipe-GPT steps in. Our AI-powered tool is your ultimate baking companion, taking the guesswork out of the process. Instantly generate recipes tailored to your needs, from a classic cheesecake to a simple no-bake dessert. You’ll discover quick and practical ideas, including the best cheesecake recipe for a special occasion or an easy one for a weeknight treat. Every recipe features clear, simple steps designed for any skill level.
In this ultimate guide, we’ll help you turn those dessert dreams into a delicious reality with over 50 delightful cakes and pies. You’ll explore everything from creamy cheesecakes and comforting apple pies to speedy no-bake options and seasonal favorites. We’ll show you how AI transforms your baking experience, ensuring the perfect recipe is always at your fingertips. Let’s start by looking at how our AI helps you create the perfect treat.
How Can AI Help You Bake the Perfect Cake or Pie?
Generate Instant Recipes for Cakes and Pies
Wish you had a personal baking assistant? Recipe-GPT simplifies creating delicious cake and pie recipes, so you can stop scrolling endlessly through cookbooks.
Our AI-powered platform quickly generates recipes tailored to you. Just tell us what you’re craving, whether it’s a classic dessert or something new and exciting.
Get instant inspiration for a variety of delightful treats:
Easy cheesecake recipes: From quick no-bake options to rich, homemade New York-style.
Simple pound cakes: Perfect for beginner bakers.
Homemade fruit pies: Think juicy apple, sweet cherry, or fresh peach pie.
Quick chocolate cakes: Ideal for last-minute dessert cravings.
Spend less time searching and more time baking with tailored dessert ideas at your fingertips.
Use Ingredients You Already Have
Not sure what to make with the ingredients in your pantry? Recipe-GPT can help. Simply list what you have on hand, and our AI will generate cake and pie recipes you can make right now.
This smart feature helps you reduce food waste, save trips to the grocery store, and transform everyday staples into something special. For instance, common items like flour, sugar, eggs, and butter can become a delicious easy cheesecake or a simple pound cake.
Here’s how our AI helps you:
No more wasted food: Use up those last apples or that carton of cream cheese.
Budget-friendly baking: Create amazing desserts without buying extra items.
Creative cooking: Discover new combinations using your existing stock.
Turn “what should I make?” moments into confident baking decisions. You’ll be amazed at what you can create with what you already have.
Get Easy Substitutions and Variations
Missing a key ingredient or need to cater to a specific diet? Recipe-GPT makes it easy by offering smart substitutions and variations to suit your needs.
Need a gluten-free pie crust or a vegan no-bake cheesecake? The AI can adapt recipes on the fly. This flexibility makes baking accessible to everyone and encourages you to try new things with confidence.
Some helpful variations include:
Dietary adjustments: Easily find vegan, gluten-free, or dairy-free options.
Ingredient swaps: Don’t have buttermilk? The AI suggests a simple alternative.
Flavor twists: Change the fruit in a cobbler or add different spices to a cake.
Bake delicious treats for any taste or preference. Our AI helps you handle any kitchen challenge with confidence.
Adjust Serving Sizes for Any Occasion
Baking for one, a small family, or a big party? Recipe-GPT adjusts recipes to fit any occasion. Our AI instantly scales ingredients up or down, ensuring you always have the perfect amount.
Eliminate the guesswork of halving or doubling recipes, which saves you time and prevents food waste. For instance, a quick cheesecake recipe can become a mini dessert for two, while a simple pound cake can be scaled up to feed a crowd.
Consider these convenient benefits:
For small gatherings: Easily reduce a recipe for two or four people.
For big celebrations: Scale up any dessert to serve many guests.
Reduce waste: Bake only what you need, avoiding excess leftovers.
This gives you peace of mind to bake efficiently, without the hassle of complex calculations.
Our Top AI-Generated Cheesecake Recipes
Easy No-Bake Cheesecake Recipe
Craving a sweet dessert but short on time? A no-bake cheesecake is the perfect solution. This treat is incredibly easy to make, and our AI can help you get started.
Recipe-GPT can instantly generate a personalized recipe. You can tell it your preferred crust—from a classic graham cracker to a fun alternative like crushed Oreos—and add your favorite toppings.
Since this dessert requires no oven, it comes together with minimal effort. That makes it ideal for warm days or busy schedules. Just mix, chill, and enjoy a wonderfully creamy treat.
Here’s how AI simplifies your no-bake cheesecake:
Instant Customization: Get suggestions for different flavors.
Ingredient Swaps: AI can suggest substitutions for cream cheese or sweeteners.
Dietary Adjustments: Easily adapt for gluten-free crusts or dairy-free fillings.
Serving Size: Adjust the recipe for a single serving or a family gathering.
Classic Homemade New York-Style Cheesecake
For many, the New York-style cheesecake is the ultimate indulgence. Its rich, dense, and incredibly creamy texture sets it apart. Achieving that perfect balance can feel like a challenge.
However, Recipe-GPT takes the guesswork out of baking this classic. Our AI guides you through each step to ensure a signature smooth finish without any cracks. It can also explain techniques like using a water bath, which helps create a perfect texture [1].
Imagine serving a bakery-quality cheesecake, made confidently in your own kitchen. Our AI helps you master this iconic dessert.
Recipe-GPT assists with your classic cheesecake by:
Precise Baking Times: Get recommended baking times based on your pan size.
Water Bath Guidance: Learn simple steps for using a water bath effectively.
Flavor Variations: Explore additions like vanilla bean or citrus zest.
Troubleshooting Tips: AI can suggest fixes for common baking issues.
Simple 3-Ingredient Cheesecake
Need a dessert that requires almost no fuss? Our AI can turn a few ingredients into a delightful treat. The 3-ingredient cheesecake is a prime example of how simplicity can be delicious.
This popular recipe typically uses just cream cheese, eggs, and sweetened condensed milk. Recipe-GPT can identify these staples from your pantry and instantly generate a straightforward recipe, which is perfect when you need a quick dessert.
This cheesecake proves that you don’t need a long list of ingredients to make an amazing dessert.
How Recipe-GPT helps with minimal ingredient recipes:
“Ingredients On Hand” Feature: Input what you have, and get recipe ideas.
Fast Inspiration: Discover quick options like this cheesecake instantly.
Easy Flavor Boosts: AI can suggest simple additions, like a squeeze of lemon.
Budget-Friendly Meals: Make the most of what you already own.
Easy Lemon Cheesecake
Brighten your day with a refreshing lemon cheesecake! The tangy zest and juice uplift the creamy base. This dessert is perfect for any season.
Whether you prefer a baked or no-bake version, Recipe-GPT can tailor an easy lemon cheesecake recipe for you. You can adjust the level of tartness and get suggestions on the best way to incorporate fresh lemon flavor.
The result is a harmonious blend of creamy and citrusy notes, making for a truly delightful dessert experience.
Let Recipe-GPT customize your lemon cheesecake:
Tartness Control: Adjust the lemon quantity to your liking.
Crust Suggestions: Pair it with a classic graham cracker or shortbread crust.
No-Bake Lemon Option: Get a speedy version for warmer weather.
Garnish Ideas: AI can suggest simple decorations, like whipped cream and fresh berries.
Is cheesecake better baked or not baked?
The great cheesecake debate comes down to one question: baked or no-bake? Both offer a delightful dessert experience, but they deliver very different textures and flavors. Deciding which is “better” truly comes down to personal taste. Fortunately, Recipe-GPT makes it easy to explore both options, allowing you to quickly generate a cheese cake recipe tailored to your preference.
The Classic: Baked Cheesecake
Rich and dense, baked cheesecake is what many people picture when they think of this classic dessert. It uses eggs and a careful baking process to create its signature texture, which sets into a smooth, custard-like consistency.
Texture: Baked cheesecakes are firm yet creamy, often with a slightly tangy flavor. To achieve a perfectly velvety finish, many recipes recommend a water bath, a technique that ensures even cooking.
Preparation: Making a homemade cheesecake recipe typically takes more time because it’s a multi-step process. After mixing and baking for about an hour, it requires a long chilling time, which is crucial for the filling to set properly.
Flavor Profile: The baking process deepens the flavors of key ingredients like cream cheese, sugar, and vanilla, resulting in a rich and complex taste.
If you crave that luxurious, melt-in-your-mouth richness, a baked best cheesecake recipe is for you. Recipe-GPT can help you find an easy cheesecake recipe with clear instructions, guiding you through each step from crust to creamy filling.
The Quick Fix: No-Bake Cheesecake
No-bake cheesecake is a fantastic alternative, especially when you need a quick cheesecake recipe. This version skips the oven entirely, relying on refrigeration to set the filling instead.
Texture: Lighter and airier than its baked counterpart, a no-bake cheesecake has a mousse-like consistency, which is often achieved with whipped cream or gelatin.
Preparation: The biggest advantage is speed. A no bake cheesecake recipe comes together in minutes—you simply mix the ingredients and chill. This makes it an easy no bake cheesecake perfect for beginners.
Flavor Profile: These cheesecakes are often sweeter and offer a refreshing, fruity taste, making them a popular choice for summer desserts.
For busy home cooks or those new to baking, a simple cheesecake recipe that doesn’t require an oven is ideal. Recipe-GPT can generate delicious easy cheesecake recipe no bake options and even suggest variations based on ingredients you have, such as a no bake cheese cake with berries.
Baked vs. No-Bake: A Quick Comparison
To help you decide, here’s a quick look at the main differences:
Feature
Baked Cheesecake
No-Bake Cheesecake
Cooking Method
Oven-baked, often with a water bath
Refrigerated, no oven needed
Texture
Dense, rich, creamy, custard-like
Lighter, airier, mousse-like
Preparation Time
Longer (mixing, baking, chilling)
Shorter (mixing, chilling)
Key Ingredients
Cream cheese, eggs, sugar
Cream cheese, sugar, whipped cream/gelatin
Ideal For
Special occasions, classic dessert lovers
Quick desserts, hot weather, beginners
Choosing Your Perfect Cheesecake with AI
So, which cheesecake is better? The answer depends entirely on your preference and situation. If you want a rich, classic dessert for a special occasion, opt for a baked version. If you need a fast, refreshing treat, go for no-bake. This modern debate continues a long history—cheesecake has been a beloved dessert for centuries, with early forms dating back to ancient Greece [2].
Recipe-GPT makes your choice simple. Just tell the AI what you’re looking for, whether it’s a quick cheesecake recipe or the best cheesecake recipe for a holiday gathering. You can even input your time constraints or mention the ingredients for cheesecake you have on hand. Our AI instantly provides personalized suggestions, taking the guesswork out of your planning. This leads to more confidence in the kitchen and stress-free cooking decisions with Recipe-GPT!
Classic & Simple Cake Recipes for Any Skill Level
Easy Pound Cake & Coffee Cake
Craving a comforting slice of cake? Pound cake and coffee cake are timeless classics. They are simple to prepare, offer a delightful homemade taste, and don’t require expert baking skills.
Recipe-GPT makes finding the perfect recipe effortless. Simply tell our AI what ingredients you have, such as “pound cake using oranges,” and it will quickly generate a personalized recipe for you.
Here’s how Recipe-GPT can help you bake these classics:
Ingredient Flexibility: Our AI suggests delicious variations based on what you have. Have extra berries for your coffee cake? Want to add a lemon glaze to your pound cake? Just ask.
Quick Substitutions: Run out of an ingredient? Ask Recipe-GPT for easy swaps to keep your baking stress-free and fun.
Adjusting for Occasions: Whether you need a small loaf or a large bundt, Recipe-GPT instantly adjusts serving sizes so you always have the right amount.
Imagine enjoying a warm slice of homemade pound cake with afternoon tea, or a piece of coffee cake for a relaxed weekend breakfast. Our AI companion guides you every step, making these comforting treats easier than ever.
Moist Carrot Cake & Red Velvet Cake
Carrot cake and red velvet cake are beloved for their rich flavors and moist texture. While many people think they are complicated to make, the right guidance makes them surprisingly achievable for any home baker.
Recipe-GPT turns potential baking challenges into successes by providing clear, step-by-step instructions. You can create these showstopping desserts with ease and confidence.
Discover how our AI streamlines your baking process:
Personalized Flavor Profiles: Prefer more cinnamon in your carrot cake or a less sweet red velvet? Recipe-GPT tailors spice levels and sugar content to match your exact preferences.
Dietary Adjustments: Easily request a gluten-free carrot cake or a vegan red velvet. Our AI suggests appropriate substitutions that maintain a delicious flavor and texture.
Tips for Moistness: Recipe-GPT includes smart tips right in the instructions to help ensure your cake comes out perfectly moist every time.
Say goodbye to dry, crumbly cakes and hello to beautifully moist, flavorful results. Recipe-GPT empowers you to bake these iconic desserts with confidence, turning any occasion into a celebration.
Simple Birthday Cake Ideas
Every birthday deserves a special cake, but planning and baking one can feel overwhelming. Recipe-GPT makes creating a memorable birthday cake simple and fun, so you can stop stressing over the perfect recipe.
Our AI-powered generator considers your preferences to help you design a cake that perfectly matches the celebration, providing tailored inspiration in moments.
Let Recipe-GPT be your ultimate birthday cake planner:
Flavor Customization: What’s the birthday person’s favorite flavor? Simply ask for a “chocolate birthday cake with sprinkles” or “vanilla cake with fruit” to receive personalized options.
Allergy-Friendly Options: Easily request dairy-free, nut-free, or egg-free recipes. Recipe-GPT helps ensure a safe and enjoyable cake for all your guests.
Skill Level Matching: Whether you’re a beginner or an experienced baker, our AI offers appropriate recipes, from easy sheet cakes to more intricate designs.
Serving Size Flexibility: Baking for a small family gathering or a large party? Recipe-GPT adjusts the recipe to fit your guest list perfectly.
Celebrate confidently with a cake made just right for the occasion. Recipe-GPT simplifies the planning so you can focus on the joy of the celebration.
Easy Tiramisu, Tres Leches & Sponge Cake Recipes
Want to bake an elegant dessert like Tiramisu, Tres Leches, or a light and airy Sponge Cake? These classics might seem daunting, but with clear instructions, they are entirely achievable for home bakers.
Recipe-GPT demystifies these sophisticated treats by breaking down complex steps into an intuitive, easy-to-follow format. You’ll achieve impressive results without the guesswork.
Here’s how our AI helps you master these diverse cakes:
Simplified Steps: Our generator provides concise, actionable instructions that guide you smoothly through each stage of the recipe.
Ingredient Swaps for Tiramisu: Want to make an alcohol-free tiramisu? Or use a different type of cookie? Recipe-GPT suggests creative and practical substitutions.
Tres Leches Milk Combinations: Curious about different milk combinations for your tres leches cake? Our AI helps you customize the richness and sweetness to your exact preference.
Sponge Cake Variations: Turn your sponge cake into the perfect base for other desserts. Recipe-GPT can suggest delicious fillings, glazes, and fruit pairings.
Unlock your potential to create impressive global desserts. Recipe-GPT turns kitchen uncertainty into a confident, enjoyable baking experience, making sophisticated recipes accessible to everyone.
A Guide to Easy Fruit Pies, Cobblers, and Crisps
A vibrant, photorealistic, professional food photography close-up of a warm, bubbling, golden-brown apple cobbler, fresh from the oven, served in a rustic ceramic baking dish. A scoop of melting vanilla ice cream is gently placed on top. The scene is set on a wooden table in a cozy home kitchen, with hints of fresh apples and a warm ambiance in the background. High-quality food magazine photo style, emphasizing texture and warmth.
Easy Apple Pie & Apple Crisp Recipes
Craving a classic dessert? Apple pie and apple crisp are always a good choice. They bring comforting flavors to any meal, and making them is simpler than you might think.
While an apple pie has a full pastry crust on the top and bottom, an apple crisp features a buttery, crumbly topping, often with oats. Both are delicious ways to enjoy fresh apples.
With Recipe-GPT, finding the perfect apple dessert is fast. Just tell our AI what you have, for example: “AI, give me an apple crisp recipe using Granny Smith apples and oats.”
Our AI can also suggest delightful variations:
Spice blends: Try cinnamon, nutmeg, or a hint of cardamom.
Add-ins: Consider cranberries, walnuts, or a splash of bourbon.
Dietary needs: Easily generate a gluten-free apple crisp or a vegan apple pie.
You’ll spend less time searching and more time baking your personalized dessert.
Simple Peach Cobbler (Using Fresh or Canned Peaches)
Peach cobbler is a warm, bubbly dessert that’s perfect for any season. It’s also incredibly easy to make, and you can use fresh peaches in summer or canned peaches year-round.
Recipe-GPT makes it even easier by adapting recipes to your ingredients. Just ask, “AI, I have canned peaches. Give me a simple peach cobbler recipe.”
You’ll get clear, step-by-step instructions, so you can bake with confidence. Recipe-GPT can also adjust serving sizes. Whether you need a small treat for two or a large dish for guests, our AI has you covered.
Here are a few quick tips for an irresistible cobbler:
Fruit prep: If using fresh peaches, blanch and peel them for best texture.
Flavor boost: A squeeze of lemon juice brightens the peach flavor.
Topping trick: Dot your topping with small pieces of butter before baking for extra richness.
Recipe-GPT takes the stress out of baking, helping you go from undecided to delicious.
Best Cherry Pie & Easy Blueberry Pie
Berry pies are vibrant and full of flavor. A cherry pie offers a sweet-tart punch, while blueberry pie is a classic sweet treat. Both are excellent choices for beginners.
Don’t worry if you don’t have fresh fruit. Frozen cherries and blueberries work wonderfully. Frozen fruit is often just as flavorful and requires less prep time.
Recipe-GPT helps you whip up these berry delights in no time. For instance, just ask, “AI, generate an easy blueberry pie recipe using frozen blueberries.”
It’s also easy to make substitutions. Need to swap one fruit for another? Our AI can guide you, so you can always bake, even with limited ingredients.
Try these quick tips for your berry pies:
Thicken fruit filling: Cornstarch or tapioca flour are great for preventing a runny pie.
Vent crust: Cut slits in your top crust for steam to escape.
Serve warm: Berry pies are best enjoyed slightly warm, perhaps with a scoop of vanilla ice cream.
Recipe-GPT makes finding the right dessert an enjoyable experience, delivering delicious, tailored recipes in seconds.
Easy Fruit Cobbler and Crumble Recipes
Cobblers and crumbles are incredibly versatile desserts. They’re simple to make and can be adapted for almost any fruit, including berries, pears, and rhubarb.
The basic formula is straightforward: a fruit base, often sweetened and spiced, covered with a simple topping. For a cobbler, that’s a biscuit-like topping; for a crumble, it’s a streusel.
Recipe-GPT is your go-to for endless fruit dessert ideas. Just ask our AI for creative combinations, like: “AI, what fruit crumble can I make with mixed berries and oats?”
Our AI can also:
Suggest topping types: Explore biscuit, cake, or streusel toppings.
Generate based on seasonal fruit: Get ideas for whatever is in season.
Provide quick ingredient lists: Spend less time planning and more time baking.
This personalization removes the stress from deciding what to bake, helping you gain confidence with new recipes. In fact, AI-powered tools are making meal planning more efficient for millions by offering instant, tailored suggestions [3].
Go from kitchen uncertainty to confident, enjoyable baking with Recipe-GPT.
How to Make an Easy Pie Crust From Scratch
A clear, photorealistic, professional food photography shot of a home cook’s hands, with slightly floured fingers, gently pressing a freshly made, pliable pie dough into a fluted glass pie dish on a light wooden countertop in a clean, well-lit home kitchen. Ingredients like flour, butter, and a rolling pin are softly blurred in the background. Natural light, high-quality food magazine photo style, conveying ease and accessibility for beginners.
Crafting a homemade pie crust might seem daunting, but it’s much simpler than you think. With just a few basic ingredients, you can create a flaky, delicious foundation that will elevate any pie you bake. Recipe-GPT simplifies every step, turning complicated baking into an easy and enjoyable experience.
Once you try this easy recipe, you’ll say goodbye to store-bought crusts. Making it yourself gives you full control, ensuring a superior taste and texture every time. Plus, Recipe-GPT can instantly generate personalized pie recipes to pair with your homemade crust, helping you create a truly special dessert.
Essential Ingredients for a Perfect Pie Crust
You only need a few pantry staples to create a tender, flaky pie crust. The secret to success is keeping your ingredients, especially the butter and water, as cold as possible.
All-Purpose Flour: Provides the structure for your crust.
Unsalted Butter: Very cold butter is essential. As it bakes, it creates pockets of steam that result in a light, flaky texture. For an especially tender crust, you can use shortening instead.
Ice Water: Helps bind the dough together without developing too much gluten, which can make the crust tough.
Salt: A pinch of salt enhances the overall flavor and balances the richness of the butter.
Step-by-Step Guide to an Easy Pie Crust
Follow these simple steps for a beautiful, ready-to-fill pie crust. Remember, properly chilling the dough is a crucial part of the process!
Combine Dry Ingredients: In a large bowl, whisk together 1 ½ cups of all-purpose flour and ½ teaspoon of salt to ensure they are evenly distributed.
Cut in Cold Butter: Add ½ cup (1 stick) of very cold, cubed unsalted butter. Using a pastry blender or your fingertips, cut the butter into the flour until the mixture resembles coarse crumbs with some pea-sized pieces of butter still visible.
Add Ice Water Gradually: Sprinkle 3 tablespoons of ice water over the flour mixture. Gently toss with a fork, adding more water one teaspoon at a time, just until the dough starts to come together in clumps. It should not feel wet or sticky.
Form the Dough: Turn the dough out onto a lightly floured surface and gently press it together into a 1-inch thick disc. Avoid kneading, as overworking the dough develops gluten and creates a tough crust.
Chill the Dough: Wrap the disc tightly in plastic wrap and refrigerate for at least 30 minutes. This critical step allows the gluten to relax and the butter to firm up, making the dough easier to roll and creating a flakier final crust.
Roll Out the Crust: On a lightly floured surface, roll the chilled dough from the center outwards into a 12-inch circle. Rotate the dough often to ensure it doesn’t stick.
Transfer to Pie Plate: Carefully place the rolled dough into a 9-inch pie plate. Trim the excess dough, leaving about a ½-inch overhang, then flute or crimp the edges as desired.
Prepare for Baking: If your recipe calls for a pre-baked crust (blind baking), prick the bottom with a fork. Line the crust with parchment paper and fill with pie weights or dried beans. Chill it again for 15-20 minutes to help prevent shrinkage while baking.
Pro Tips for Pie Crust Success
Achieve a consistently flaky and delicious crust every time with these helpful pointers. Recipe-GPT can also help you adapt these tips to any pie recipe it generates.
Keep Everything Cold: Cold butter creates steam in the oven, which is the key to a flaky texture. Work quickly and consider chilling your bowl and flour beforehand on a hot day.
Don’t Overwork the Dough: Mix the dough just until it holds together. Overworking it develops gluten, resulting in a tough, chewy crust instead of a tender one.
Chill Time is Critical: Never skip the chilling steps. Chilling relaxes the gluten, solidifies the butter, and prevents the crust from shrinking while it bakes.
Use a Light Touch: When rolling out the dough, apply light, even pressure from the center outwards. This helps preserve the small pockets of butter that create those desirable flaky layers.
Consider Blind Baking: For recipes with wet fillings, like custards or quiches, pre-baking the crust (blind baking) is essential. This step prevents a soggy bottom and guarantees a crisp crust [4].
How Recipe-GPT Simplifies Your Pie Baking Adventures
Recipe-GPT transforms your baking experience by making homemade pies more accessible than ever. Here’s how our AI-powered tool can help:
Instant Pie Recipe Generation: Simply tell Recipe-GPT you have a homemade pie crust, and it will suggest delicious fillings—from classic apple and cherry to savory quiche ideas.
Personalized Fillings: Customize your pie filling based on the ingredients you already have. Our AI can suggest creative twists like “apple pie with pecans” or “berry pie with a hint of lemon.”
Easy Substitutions: Ran out of a specific fruit or ingredient? Recipe-GPT offers smart substitutions to ensure your pie still tastes amazing.
Adjust Serving Sizes: Whether you’re baking for two or a crowd, our AI can scale your pie filling recipe to match your needs perfectly.
Dietary Variations: Explore options for gluten-free crusts or vegan fillings. Recipe-GPT provides tailored recommendations, making pie baking inclusive for everyone.
With Recipe-GPT, you can move from baking uncertainty to kitchen confidence. It’s your AI companion for delicious, personalized pies. Enjoy the deep satisfaction of baking from scratch!
Quick Dessert Recipes for Busy Days
Easy Dump Cake Recipes (Peach, Pumpkin, Apple)
Busy days call for brilliant solutions, especially when dessert cravings hit. Dump cakes are the ultimate quick fix. As the name suggests, you simply “dump” the ingredients into a baking dish and let the oven do the work.
Recipe-GPT makes this process even easier. Tell our AI what fruit you have on hand, such as peaches or apples, and it will instantly generate a customized dump cake recipe for you. It can also suggest fun twists and ingredient swaps based on what’s in your pantry.
Peach Dump Cake: A Sweet Classic
This dessert is pure comfort and perfect for when you need a warm, fruity treat without the fuss. The ingredients are minimal, but the flavor is big.
What you’ll need:
1 (29-ounce) can sliced peaches in heavy syrup, undrained
1 box yellow cake mix (15.25 ounces)
1/2 cup (1 stick) unsalted butter, melted
Optional: 1/2 teaspoon cinnamon or a pinch of nutmeg
Simple Steps:
Preheat your oven to 350°F (175°C).
Pour the undrained peaches into a 9×13-inch baking dish and spread them evenly.
Sprinkle the dry cake mix evenly over the peaches.
Drizzle the melted butter over the cake mix, covering as much as possible.
Bake for 45-55 minutes, or until the top is golden brown and the edges are bubbly.
Serve warm, ideally with a scoop of vanilla ice cream.
Recipe-GPT Tip: Ask Recipe-GPT for other fruit combinations. For example, request an apple dump cake with cinnamon spice or a pumpkin dump cake for fall. The AI will even adjust the spices for you.
Seasonal Dump Cake Ideas
Recipe-GPT adapts to your cravings. If you want something seasonal, just tell our AI what you’re in the mood for.
Pumpkin Dump Cake: For a fall favorite, mix a can of pumpkin puree with pumpkin pie spice and condensed milk. Top it with a yellow or spice cake mix and butter, then bake.
Apple Dump Cake: Use canned apple pie filling as your base. Sprinkle a yellow or butter pecan cake mix over it, finish with melted butter, and bake.
Our AI-powered generator can provide variations for these recipes, such as adding chopped nuts or a caramel drizzle. By taking your preferences into account, it makes meal planning effortless.
Simple Pudding Recipes (Banana, Chocolate, Rice)
Pudding is a classic comfort food that is incredibly versatile and quick to prepare. Whether you prefer creamy, fruity, or rich, there’s a pudding recipe for every taste.
With Recipe-GPT, finding the perfect pudding is simple. Our AI can generate recipes based on ingredients you already have. For instance, if you have ripe bananas, it can create a delicious banana pudding recipe. It can also provide options for dietary needs, like dairy-free or low-sugar versions.
Quick Chocolate Pudding (from Scratch)
Forget the box mix. Making homemade chocolate pudding is not only easy, but it also tastes much better than the store-bought version. Plus, you likely have most of the ingredients already.
Ingredients:
1/2 cup granulated sugar
1/4 cup unsweetened cocoa powder
3 tablespoons cornstarch
Pinch of salt
2 cups milk (dairy or non-dairy)
1 teaspoon vanilla extract
1 tablespoon unsalted butter (optional)
Instructions:
In a medium saucepan, whisk together the sugar, cocoa powder, cornstarch, and salt.
Gradually whisk in the milk until the mixture is smooth.
Place the saucepan over medium heat. Cook while stirring constantly until the pudding thickens and begins to bubble (about 5-8 minutes).
Remove from the heat and stir in the vanilla extract and butter (if using).
Pour into individual serving dishes or a single large bowl.
To prevent a skin from forming, press plastic wrap directly onto the surface of the pudding.
Chill for at least 2 hours before serving.
Recipe-GPT Tip: Need a vegan option? Ask Recipe-GPT for a dairy-free chocolate pudding. It can suggest using almond or oat milk and swapping coconut oil for butter, providing a personalized recipe every time.
Other Easy Pudding Delights
Recipe-GPT offers endless pudding inspiration. You can explore many variations with just a few clicks.
Banana Pudding: Layer vanilla wafers, sliced bananas, and homemade (or instant) vanilla pudding. Finish with a topping of whipped cream.
Rice Pudding: Simmer rice with milk, sugar, and vanilla until creamy. For extra flavor, add raisins or a sprinkle of cinnamon.
Think of our AI as your personal recipe assistant. It helps you discover new dishes and adapt them to your lifestyle, making mealtime decisions easy.
No-Bake Chocolate Eclair Cake
Imagine a dessert that tastes like a fancy eclair but requires no time in the oven. That’s the magic of a No-Bake Chocolate Eclair Cake. It’s a perfect option for busy cooks who want an impressive dessert without the wait.
Recipe-GPT can help you master this simple treat. Our AI can adjust the recipe for different pan sizes or suggest variations for the filling and topping. Simply state your preferences, and it will deliver tailored guidance.
Simple No-Bake Chocolate Eclair Cake
This crowd-pleasing recipe uses readily available ingredients. It features layers of graham crackers, a creamy vanilla filling, and a rich chocolate glaze that are incredibly simple to assemble.
In a large bowl, whisk the instant pudding mixes and cold milk for 2 minutes until the mixture thickens.
Gently fold in the thawed whipped topping until just combined.
Arrange a single layer of graham crackers in the bottom of a 9×13-inch baking dish, breaking them as needed to fit.
Spread half of the pudding mixture over the graham crackers.
Add another layer of graham crackers, followed by the remaining pudding mixture.
Place one final layer of graham crackers on top.
Prepare the Glaze: In a medium saucepan, melt the butter over medium heat. Whisk in the cocoa powder and milk. Bring the mixture to a gentle boil, then remove it from the heat.
Stir in the powdered sugar and vanilla extract until the glaze is smooth.
Pour the warm glaze evenly over the top layer of graham crackers.
Cover the dish and chill for at least 4-6 hours, or preferably overnight, to allow the graham crackers to soften.
Recipe-GPT Tip: Our AI can help you customize this recipe. Ask for a coffee-flavored filling, a dark chocolate glaze, or an alternative cookie base like shortbread for a different texture.
No-bake desserts are a fantastic way to save time; in fact, they’re a popular choice for their convenience [5]. Recipe-GPT empowers you to create delicious treats with ease, transforming mealtime stress into cooking confidence.
Seasonal Favorites: Pumpkin & Sweet Potato Treats
Easy Pumpkin Pie (Classic & Crustless)
When the leaves change, our kitchens fill with warming flavors, and pumpkin pie is the quintessential autumn classic. Its creamy texture and rich spice blend are simply irresistible, but making a delicious pie doesn’t have to be complicated.
Recipe-GPT simplifies the search for your perfect pumpkin pie recipe. You can ask for a traditional version or a modern twist. A crustless pumpkin pie, for instance, is a fantastic lighter option that’s also great for those avoiding gluten or cutting down on carbs.
Our AI can also help you customize the recipe. Simply state your preferences to adjust sweetness levels or get suggestions for alternative spices, like a hint of ginger or cardamom.
Here’s why you’ll love using AI for pumpkin pie:
Instant Recipe Generation: Get classic or crustless recipes in seconds.
Dietary Adjustments: Easily find recipes that are gluten-free or low-sugar.
Ingredient Swaps: Need to substitute an ingredient? Recipe-GPT has you covered.
Confidence in Baking: Clear, step-by-step instructions ensure success, even for beginners.
Whether you choose the classic or crustless version, you’ll be celebrating the sweet, earthy flavor of pumpkin. As a bonus, pumpkin is packed with vitamin A, which supports vision and immune health [6].
The Best Moist Pumpkin Bread Recipe
Beyond pies, pumpkin also shines in baked goods like bread. A moist pumpkin bread is a delight for breakfast, a snack, or dessert, and this type of recipe is often quick to prepare—ideal for busy days.
With Recipe-GPT, crafting your ideal pumpkin bread is effortless. Specify additions like chocolate chips, walnuts, or pecans, and our AI will generate a tailored recipe with perfect ratios for a tender, flavorful loaf every time.
Want a vegan pumpkin bread or a gluten-free option? Just ask. Recipe-GPT can adapt the recipe to fit almost any dietary need, turning your requests into simple, practical guidance.
Consider these tips for extra moist pumpkin bread:
Use pure pumpkin puree, not pumpkin pie filling.
Don’t overmix the batter; this can lead to a tough texture.
Add a touch of brown sugar for extra moisture and deeper flavor.
For an extra boost, try adding applesauce or Greek yogurt as a partial fat substitute.
This AI-powered approach removes the guesswork, guiding you to a moist, delicious pumpkin bread that suits your family’s tastes. It’s personalized baking, made easy.
Easy Sweet Potato Pie
For a delightful alternative to pumpkin, sweet potato pie is a fantastic choice. It offers a similar creamy texture but with a unique, slightly less sweet flavor profile. This pie is a staple in many kitchens, especially during the holidays.
Recipe-GPT can introduce you to the wonders of sweet potato pie with simple, accessible recipes. You’ll discover how easy it is to make this comforting dessert, and our AI can even help you compare the flavors of different variations.
Are you wondering about spices? Recipe-GPT can suggest the perfect blend for sweet potato pie. Common spices include cinnamon, nutmeg, and a hint of ginger. You can even explore regional variations, like a deeper, spicier Southern-style pie.
Sweet potatoes are also nutrient powerhouses, rich in fiber, vitamins, and minerals [7]. Enjoying a slice of sweet potato pie is a delicious way to incorporate them.
Why choose Recipe-GPT for your sweet potato pie?
Tailored Recipes: Get a recipe that fits your preferred sweetness and spice levels.
Quick Decisions: Eliminate indecision with instant recipe suggestions.
Ingredient Use: Find recipes that use ingredients you already have on hand.
Beginner-Friendly: Each step is clear and easy to follow.
From choosing between pumpkin and sweet potato to customizing your spices, Recipe-GPT simplifies your baking journey. It turns mealtime stress into enjoyable, creative cooking experiences.
Frequently Asked Questions About Cakes and Pies
Why does no-bake cheesecake taste different?
No-bake cheesecakes offer a unique texture and flavor compared to their baked counterparts. Baked cheesecakes get their dense, custard-like consistency from eggs that solidify during baking.
In contrast, no-bake versions are typically lighter and airier because they use ingredients like whipped cream or gelatin to set instead of eggs. This results in a smoother, mousse-like texture.
The flavor profile also differs. The Maillard reaction during baking gives baked cheesecakes a richer, more caramelized flavor. No-bake cheesecakes, however, have a fresher, brighter dairy taste that highlights the tang of the cream cheese. If you prefer a quick and refreshing dessert, a no-bake cheesecake is an excellent choice. Recipe-GPT can help you find the perfect no-bake recipe in moments.
What’s the secret to a creamy no bake filling?
Achieving a wonderfully creamy no-bake cheesecake filling is simpler than you might think. The secret lies in a few key ingredients and techniques, and Recipe-GPT can help you find recipes that use them.
Full-Fat Cream Cheese: Always start with full-fat cream cheese softened to room temperature. This helps it blend smoothly and prevents lumps.
Heavy Cream or Whipped Topping: Whipping heavy cream to stiff peaks adds significant volume and a luxurious, airy texture. For convenience, some quick recipes use pre-made whipped topping.
Sweetened Condensed Milk: This ingredient is a game-changer, providing sweetness, body, and a signature smooth, creamy consistency.
Proper Mixing: First, beat the cream cheese until it’s light and fluffy on its own. Then, gently fold in the other ingredients. Be careful not to overmix after adding whipped cream, as this can deflate the filling and make it less airy.
Chilling Time: Adequate chilling is crucial. Allowing the cheesecake to set for several hours helps create a cohesive, creamy slice.
With Recipe-GPT, you can easily search for “creamy no-bake cheesecake” recipes. Our AI will provide tailored suggestions that often include tips for achieving that perfect texture.
What are common no-bake cheesecake mistakes?
Even simple no-bake cheesecakes have pitfalls, but knowing these common mistakes makes them easy to avoid. Recipe-GPT provides clear, step-by-step instructions to help prevent these issues.
Not Softening Cream Cheese: Using cold cream cheese is the number one cause of a lumpy filling. Always bring it to room temperature first.
Not Chilling Long Enough: A common mistake is not giving the cheesecake enough time to set. It needs several hours, or even overnight, in the refrigerator to firm up properly.
Overmixing: While you want a smooth filling, overmixing after adding whipped cream can cause the ingredients to break down, resulting in a runny or grainy texture.
Wrong Ingredient Ratios: Follow your recipe’s measurements precisely. Using too little stabilizer (like whipped cream or gelatin) can result in a cheesecake that won’t set.
Using Low-Fat Ingredients: Low-fat cream cheese or milk can compromise the final creaminess and setting ability. Full-fat dairy provides the best results.
Not Preparing the Crust Properly: To avoid a crumbly crust, ensure your ingredients are well-mixed and pressed firmly into the pan before adding the filling.
Recipe-GPT helps you avoid these mistakes by highlighting critical steps in each recipe. Our AI offers easy-to-follow guidance for every skill level so you can cook with confidence.
What is the 3 ingredient no-bake cheesecake in Philadelphia?
The “3-ingredient no-bake cheesecake” is a popular and incredibly easy recipe, often made with Philadelphia Cream Cheese. This classic recipe uses just three main components:
Philadelphia Cream Cheese: This forms the base, providing a rich, tangy flavor and creamy texture.
Sweetened Condensed Milk: This adds sweetness and helps the cheesecake set to a firm consistency.
Lemon Juice: The juice adds a bright, zesty tang that cuts through the richness and helps thicken the mixture.
Beloved for its simplicity and speed, this minimalist recipe is perfect for busy home cooks. To make it, you simply mix the three ingredients, pour the mixture into a prepared graham cracker crust, and chill until firm. The result is a delightfully creamy and tart dessert that requires no oven, making it perfect for a quick treat. You can find many variations of this simple recipe online [8].
Recipe-GPT can instantly generate this recipe for you. Just ask for a “3-ingredient no-bake cheesecake,” and we can also suggest fun toppings or crust variations to make mealtime decisions even easier.